Arduboy Course - Part V: Level
Previous Chapter: Part IV: COLLISION DETECTION
Making a whole Level
Just do the same thing many times?

We could do the same thing multiple times to get an entire level, but then we’d have many individual obstacles and would need to check for collisions with each and every one of them.
Instead of making individual variables for all obstacles, we’ll use an array - essentially a list of obstacles.
Obstacle obstacles[4]; // Create an Array of type Obstacle with space for 4 elements

obstacles[0] = {0, 56, 8, 8}; // Access the first element and fill it with values
obstacles[1] = {0, 0, 16, 8}; // Second element
obstacles[2] = {16, 22, 8, 8}; // Third element
obstacles[3] = {24, 44, 8, 16}; // Forth element

Notice how the index of our array starts with 0, not 1. In programming all indices are usually zero-based!
Now what this allows us to do is loop through the array - for example when drawing the obstacles!
// Loop through the obstacles array
for(int i = 0; i < 4; i++) { // index "i" starts at 0, then - while it's smaller than 4, we increase it by 1 after each loop
	// now we can use "i" to access the current obstacle in the array
	arduboy.fillRect(obstacles[i].x, obstacles[i].y, obstacles[i].width, obstacles[i].height, WHITE);
}
Simple Example:
#include <Arduino.h>
#include <Arduboy2.h>

Arduboy2 arduboy;

// Define our Obstacle struct
struct Obstacle {
	int x;
	int y;
	int width;
	int height;
	int obstacleType;
  bool gone;
};

Obstacle obstacles[4]; // Create an Array of type Obstacle with space for 4 elements

void setup() {
	arduboy.begin();

	obstacles[0] = {0, 56, 8, 8}; // Access the first element and fill it with values
	obstacles[1] = {82, 0, 16, 8}; // Second element
	obstacles[2] = {46, 22, 52, 8}; // Third element
	obstacles[3] = {24, 44, 8, 16}; // Forth element
}

void loop() {
	if (!(arduboy.nextFrame()))	return;
	arduboy.clear();

	// Loop through obstacles array and draw all the obstacles
	for(int i = 0; i < 4; i++) { // index "i" starts at 0, then - while it's smaller than 4, we increase it by 1 after each loop
		arduboy.fillRect(obstacles[i].x, obstacles[i].y, obstacles[i].width, obstacles[i].height, WHITE);
	}

	arduboy.display();
}
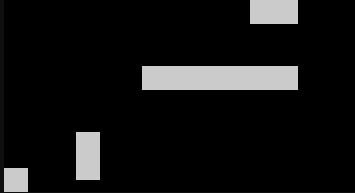
✅ Draws obstacles from an array
❎ It’s all happening in the main class
Level Class
Let’s create a new CLASS that will hold all our level-related data (most importantly all our obstacles)! And we’ll do this in a new file in our project…
-
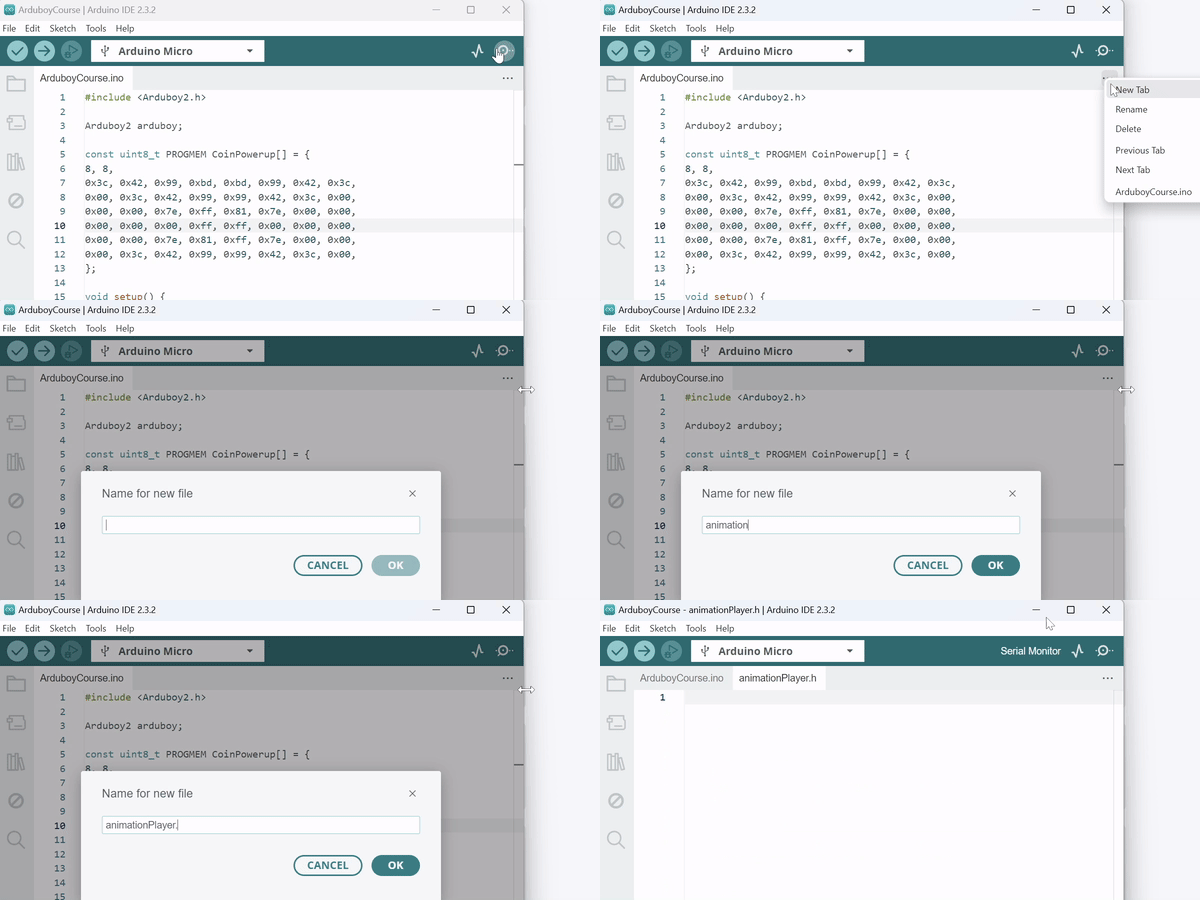
In the Arduino IDE click onto the 3 dots (
…) at the top right of the source code, then chooseNew Tab -
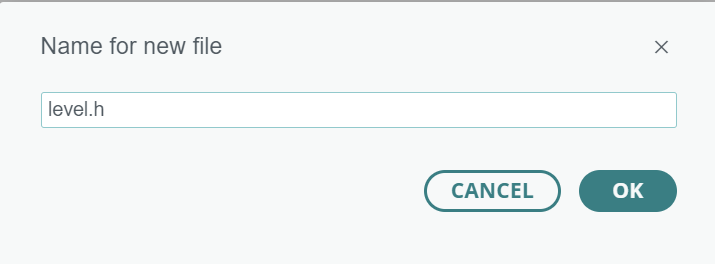
This will create a new file, call it
level.h
Let’s make a new class that will hold all the data for our level!
-
We’ll move our
Obstaclestruct into the new filelevel.h -
Create the class
Level-
Create a public array for our
obstacles -
Create a public int to hold the number of obstacles that have been added:
obstacleCount -
Create a method to add an obstacle to the Level object:
addObstacle- we’ll use this to set up our level
-
#include <Arduino.h>

struct Obstacle {
	int x;
	int y;
	int width;
	int height;
	int obstacleType;
	bool gone;
};

class Level {
    public:
        Obstacle obstacles[32]; // Array to hold Obstacles
        int obstacleCount = 0; // Counter to keep track of the number of obstacles added

				// Method for adding new obstacles to our Level
        void addObstacle(int x, int y, int width, int height, int t) {
            if (obstacleCount < 64) {
                obstacles[obstacleCount++] = {x, y, width, height}; // Add obstacle if there is space and increase obstacleCount
            }
        }
}

Note how obstacles[obstacleCount++] accesses the Obstacle at position obstacleCount and then immediately increases obstacleCount by 1! All in one! Like 🪄 magic…
Back in the main file we can now include our new file via #include "level.h" - that will pull in our Obstacle struct and our Level class!
#include <Arduino.h>
#include <Arduboy2.h>
#include "level.h" // Include our new file! Note how we use quotation marks instead of angle brackets!

Arduboy2 arduboy;
Level level; // Create an instance object of our Level class

void setup() {
	arduboy.begin();

	// Add obstacles to our level!
	level.addObstacle(0, 56, 40, 8, 0);
	level.addObstacle(64, 24, 65, 4, 0);
	level.addObstacle(64, 56, 32, 8, 0);
	level.addObstacle(0, 12, 12, 4, 0);
	level.addObstacle(112, 44, 17, 20, 0);
	level.addObstacle(0, 40, 16, 16, 0);
	level.addObstacle(32, 24, 16, 4, 0);
}

void loop() {
	if (!(arduboy.nextFrame()))	return;
	arduboy.clear();

	// Loop through the level's obstacles array and draw all the obstacles
	for(int i = 0; i < level.obstacleCount; i++) { // index "i" starts at 0, then - while it's smaller than obstacleCount, we increase it by 1 after each loop
		arduboy.fillRect(level.obstacles[i].x, level.obstacles[i].y, level.obstacles[i].width, level.obstacles[i].height, WHITE);
	}

	arduboy.display();
}

Why do we need a Level class again?
It keeps our main file clean since a lot of level-related functionality can live in the levels.h file instead of our main file. Also note how it makes it really easy for us to have multiple levels - We can simply swap out the contents of our level variable!
Move collision detection out of the main file
If all our obstacle-related stuff lives in level.h, then it makes a lot of sense to move the collision-checking in there as well!
-
Move
checkCollisionintoObstacle- that way we could also use an Obstacle just by itself without the need for aLevelobject-
One version of
checkCollisionchecks against values -
Another version of
checkCollisionchecks against anEntity
-
-
Make a
checkCollisionmethod inLevelthat takes anEntityas its argument and automatically checks for collision against all**Obstacles**in the Level
#include <Arduino.h>
#include "entity.h"

struct Obstacle {
    int x;
    int y;
    int width;
    int height;
    uint8_t obstacleType;
    bool gone;

    bool checkCollision(int x, int y, int width, int height) {
        if (x + width * 0.5 > this->x && x - width * 0.5 < this->x + this->width && // Horizontal overlap
            y + height * 0.5 > this->y && y - height * 0.5 < this->y + this->height) { // Vertical overlap
            return true;
        }
        return false;
    }

    bool checkCollision(Entity &entity) {
        if (entity.x + entity.width * 0.5 > x && entity.x - entity.width * 0.5 < x + width && // Horizontal overlap
            entity.y + entity.height * 0.5 > y && entity.y - entity.height * 0.5 < y + height) { // Vertical overlap
            return true;
        }
        return false;
    }
};

class Level {
public:
    Obstacle playArea = {0, 0, 128, 64, 255}; // Play area
    int playSpawnX = 64;
    int playSpawnY = 32;

    Obstacle obstacles[32]; // Array to hold Obstacles
    int obstacleCount = 0;  // Counter to keep track of the number of obstacles added

    void addObstacle(int x, int y, int width, int height, uint8_t t) {
        if (obstacleCount < 32) {
            obstacles[obstacleCount++] = {x, y, width, height, t}; // Add obstacle if there is space
        }
        // Optionally, handle the case where MAX_OBSTACLES is exceeded
    }

    // Method to handle collision detection
    void checkCollision(Entity &entity) {
        entity.onGround = false; // Reset onGround flag to false

        // Keep entity within bounds
        if (entity.x < 1 + entity.width * 0.5) {
            entity.x = entity.width * 0.5;
            entity.xMomentum = -entity.xMomentum * 0.5;
        }

        if (entity.x > playArea.width - 1 - entity.width * 0.5) {
            entity.x = playArea.width - entity.width * 0.5;
            entity.xMomentum = -entity.xMomentum * 0.5;
        }

        // Uncomment this if you want the entity to bounce off the top of the play area. I don't.
        // if(entity.y < 1 + entity.height * 0.5) {
        // 	entity.y = 1 + entity.height * 0.5;
        // 	entity.yMomentum = -entity.yMomentum * 0.5;
        // }

        if (entity.y > playArea.height - 1 - entity.height * 0.5) {
            entity.y = playArea.height - 1 - entity.height * 0.5;
            if (entity.land(entity.yMomentum)) {
                entity.yMomentum = 0.0;
            } else {
                entity.yMomentum = -entity.yMomentum * 0.25;
                if (abs(entity.yMomentum) < 0.2) {
                    entity.yMomentum = 0.0;
                }
            }
        }

        // Loop through all obstacles and check for collision
        for (int i = 0; i < obstacleCount; i++) {
            Obstacle &o = obstacles[i];
            if (o.gone) continue; // **************** Obstacle gone, skip it and go straight to the next loop

            if (o.checkCollision(entity)) { // Check for collision

                // IF TYPE 0, OBSTACLE IS SOLID - COLLIDE
                if (o.obstacleType == 0) {
                    // Landing on top of the obstacle
                    if (entity.yMomentum > 0 && entity.y + entity.height * 0.5 - entity.yMomentum <= o.y) {
                        // Call land method on the entity (can be used to kill it on hard impact, etc.)
                        if (entity.land(entity.yMomentum)) {
                            entity.yMomentum = 0.0;
                        } else {
                            entity.y = o.y - entity.height * 0.5;        // Adjust player position to stand on top of the obstacle
                            entity.yMomentum = -entity.yMomentum * 0.15; // Bounce
                            if (abs(entity.yMomentum) < 0.2) { // If momentum is very low, stop it completely
                                entity.yMomentum = 0.0;
                            }
                        }
                    }
                    // Collision on the bottom of the obstacle
                    else if (entity.yMomentum < 0 && entity.y - entity.height * 0.5 - entity.yMomentum >= o.y + o.height) {
                        entity.y = o.y + o.height + entity.height * 0.5; // Adjust player position to the bottom of the obstacle
                        entity.yMomentum = -entity.yMomentum * 0.15;     // bounce
                    }
                    // Collision on the left side of the obstacle
                    else if (entity.xMomentum > 0 && entity.x + entity.width * 0.5 - entity.xMomentum <= o.x) {
                        entity.x = o.x - entity.width * 0.5;         // Adjust player position to the left edge of the obstacle
                        entity.xMomentum = -entity.xMomentum * 0.25; // bounce
                    }
                    // Collision on the right side of the obstacle
                    else if (entity.xMomentum < 0 && entity.x - entity.width * 0.5 - entity.xMomentum >= o.x + o.width) {
                        entity.x = o.x + o.width + entity.width * 0.5; // Adjust player position to the right edge of the obstacle
                        entity.xMomentum = -entity.xMomentum * 0.25;   // bounce
                    }
                }
                else if (o.obstacleType == 1) { // IF TYPE 1, COLLECT IT!
                    o.gone = true;
                }
            }

            // check if entity is within 3 px of the top of a obstacle, count as onGround
            if (entity.x + entity.width * 0.5 >= o.x && entity.x - entity.width * 0.5 <= o.x + o.width && // Horizontal overlap
                entity.y + entity.height * 0.5 >= o.y - 3 && entity.y - entity.height * 0.5 <= o.y + o.height) { // Vertical overlap
                entity.onGround = true;
            }

            // check if entity is within 3 px of the bottom of the level (level height), count as onGround
            if (entity.y + entity.height * 0.5 >= playArea.height - 3 && entity.y - entity.height * 0.5 <= playArea.height) { // Vertical overlap
                entity.onGround = true;
            }
        }
    }
};
Now we can simplify the main file down to this:
#include <Arduino.h>
#include <Arduboy2.h>
#include "entity.h"
#include "level.h"
#include "animationPlayer.h"

Arduboy2 arduboy;

// Player data
Entity player = {20.0, 40.0, 10, 10};

// World data
float gravity = 0.1;
Level level = Level();
AnimationPlayer coinAnimationPlayer;

// Coin Image
const uint8_t PROGMEM Coin[] = {
8, 8,
0x3c, 0x42, 0x99, 0xbd, 0xbd, 0x99, 0x42, 0x3c,
0x00, 0x3c, 0x42, 0x99, 0x99, 0x42, 0x3c, 0x00,
0x00, 0x00, 0x7e, 0xff, 0x81, 0x7e, 0x00, 0x00,
0x00, 0x00, 0x00, 0xff, 0xff, 0x00, 0x00, 0x00,
0x00, 0x00, 0x7e, 0x81, 0xff, 0x7e, 0x00, 0x00,
0x00, 0x3c, 0x42, 0x99, 0x99, 0x42, 0x3c, 0x00,
};
// Animation times
const int coinFrameTimes[] = {100, 100, 100, 100, 100, 100};

void setup() {
	arduboy.begin();

  // Set up the coin AnimationPlayer
  coinAnimationPlayer.addAnimation(0, {Coin, 6, coinFrameTimes});

	// Set up the level
  level.addObstacle(64, 32, 8, 8, 1); // Add the coin to the level
  level.addObstacle(80, 22, 8, 8, 1); // Add another coin to the level
  level.addObstacle(60, 52, 24, 12, 0); // Add the platform to the level
  level.addObstacle(100, 42, 24, 6, 0); // A second platform
}

void loop() {
	if (!(arduboy.nextFrame()))	return;

	arduboy.clear();
  arduboy.pollButtons();

  arduboy.drawRect(0, 0, arduboy.width(), arduboy.height(), WHITE);

  player.process(gravity, arduboy.pressed(LEFT_BUTTON), arduboy.pressed(RIGHT_BUTTON), arduboy.justPressed(A_BUTTON), arduboy);
  level.checkCollision(player);

  // The player is still a circle
	arduboy.fillCircle(player.x, player.y, player.width * 0.5, WHITE);

  // Draw the level obstacles
  for(int i = 0; i < level.obstacleCount; i++) {
    if(!level.obstacles[i].gone) { // only draw if not gone!
      if(level.obstacles[i].obstacleType == 0) { // PLATFORM!
          arduboy.fillRect(level.obstacles[i].x, level.obstacles[i].y, level.obstacles[i].width, level.obstacles[i].height, WHITE);
      } else { // COIN!
          coinAnimationPlayer.draw(level.obstacles[i].x, level.obstacles[i].y);
      }
    }
  }

	arduboy.display();
}

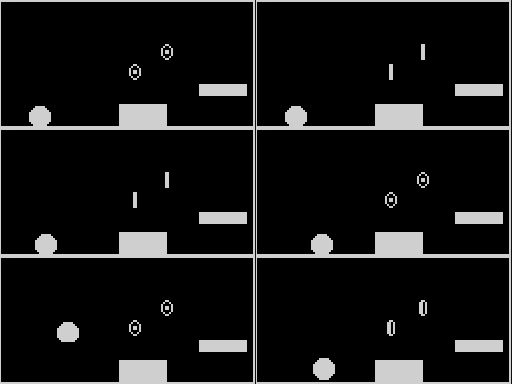
Nice! Notice how it’s now* super-easy to add multiple coins and multiple platforms*! And most interactions basically handle themselves. All we need to do is set everything up, then call player.process and level.checkCollision in loop() and then draw all the things!
Level Design - Level Editor

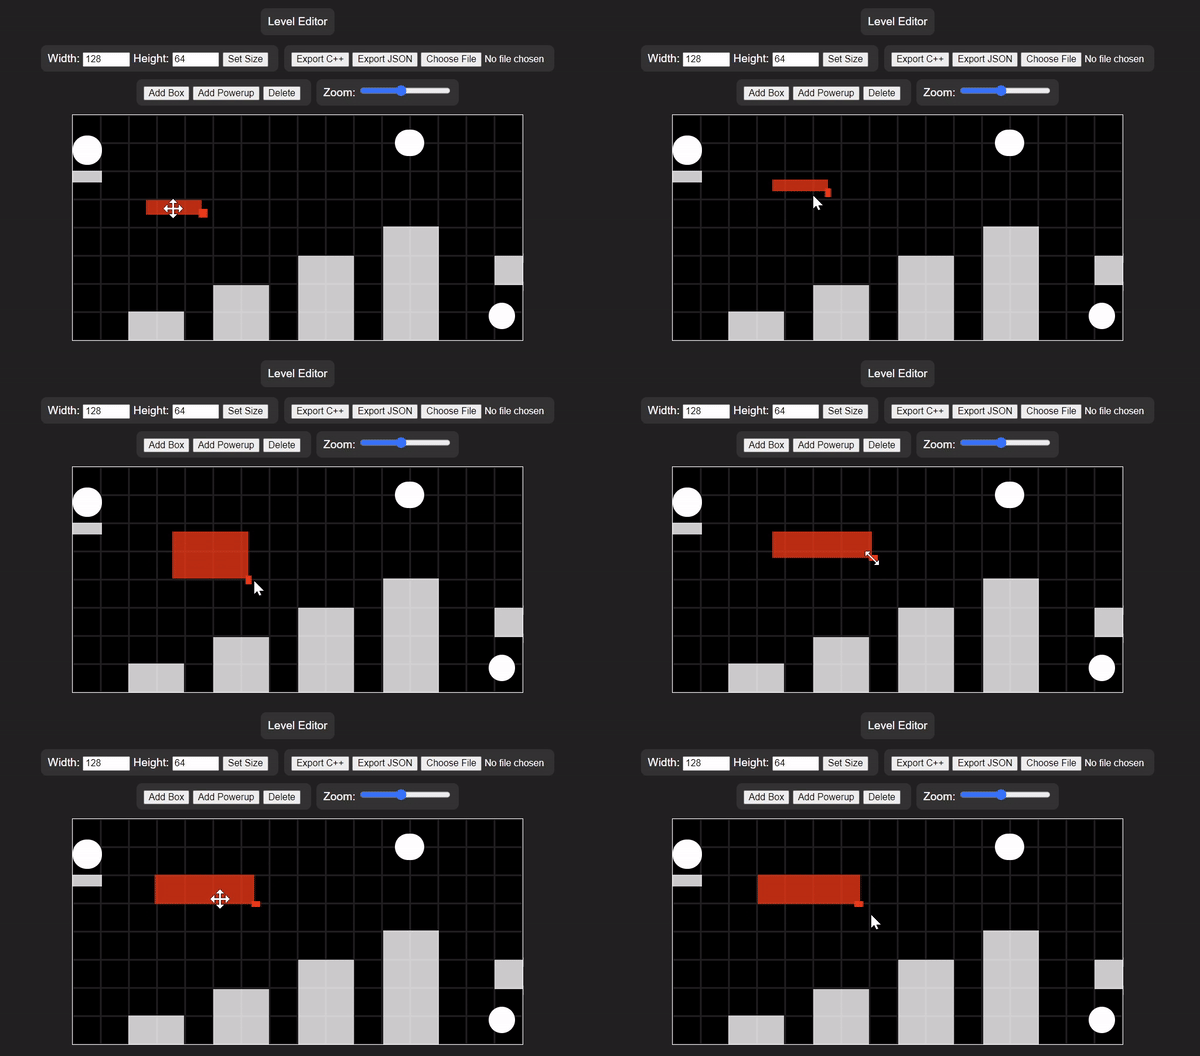
It’s cumbersome to construct a level in source code, so I made a little ➡️ LEVEL EDITOR where you can lay out a level, then simply click the Export C++ button and generate the corresponding source code!
Shortcut Keys
B - Add a box
DEL - Delete selected object
Other Features
-
It also saves the level in your browser’s localStorage, so you can work on it across sessions.
-
If you want to save the level or continue on a different PC you can export it as a JSON file for later re-import.
✨ Now go, make a level! ✨
Leave a comment