Unity’s “New Input System”
Setup
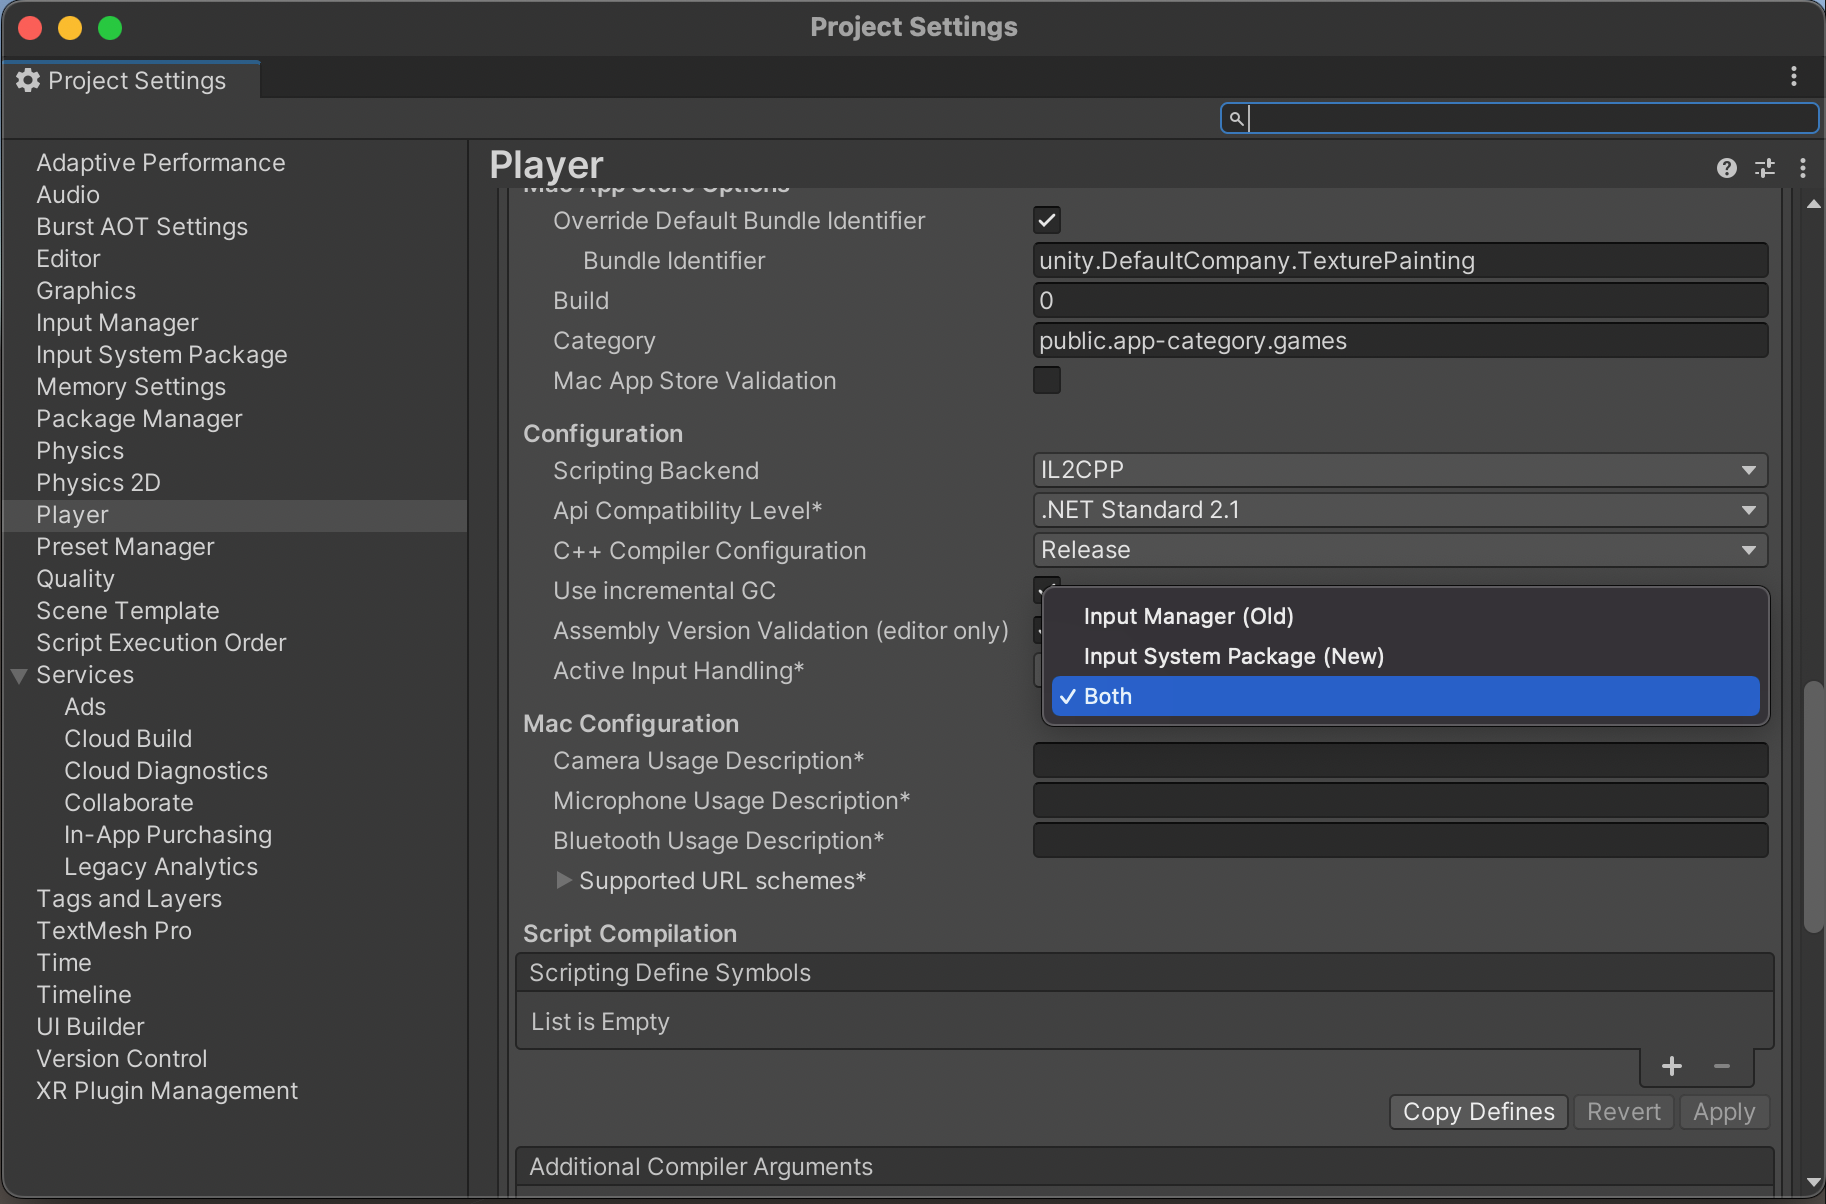
Enable new input system in Project Settings > Player > Other Settings. Set it to New or Both. (Unity will restart)
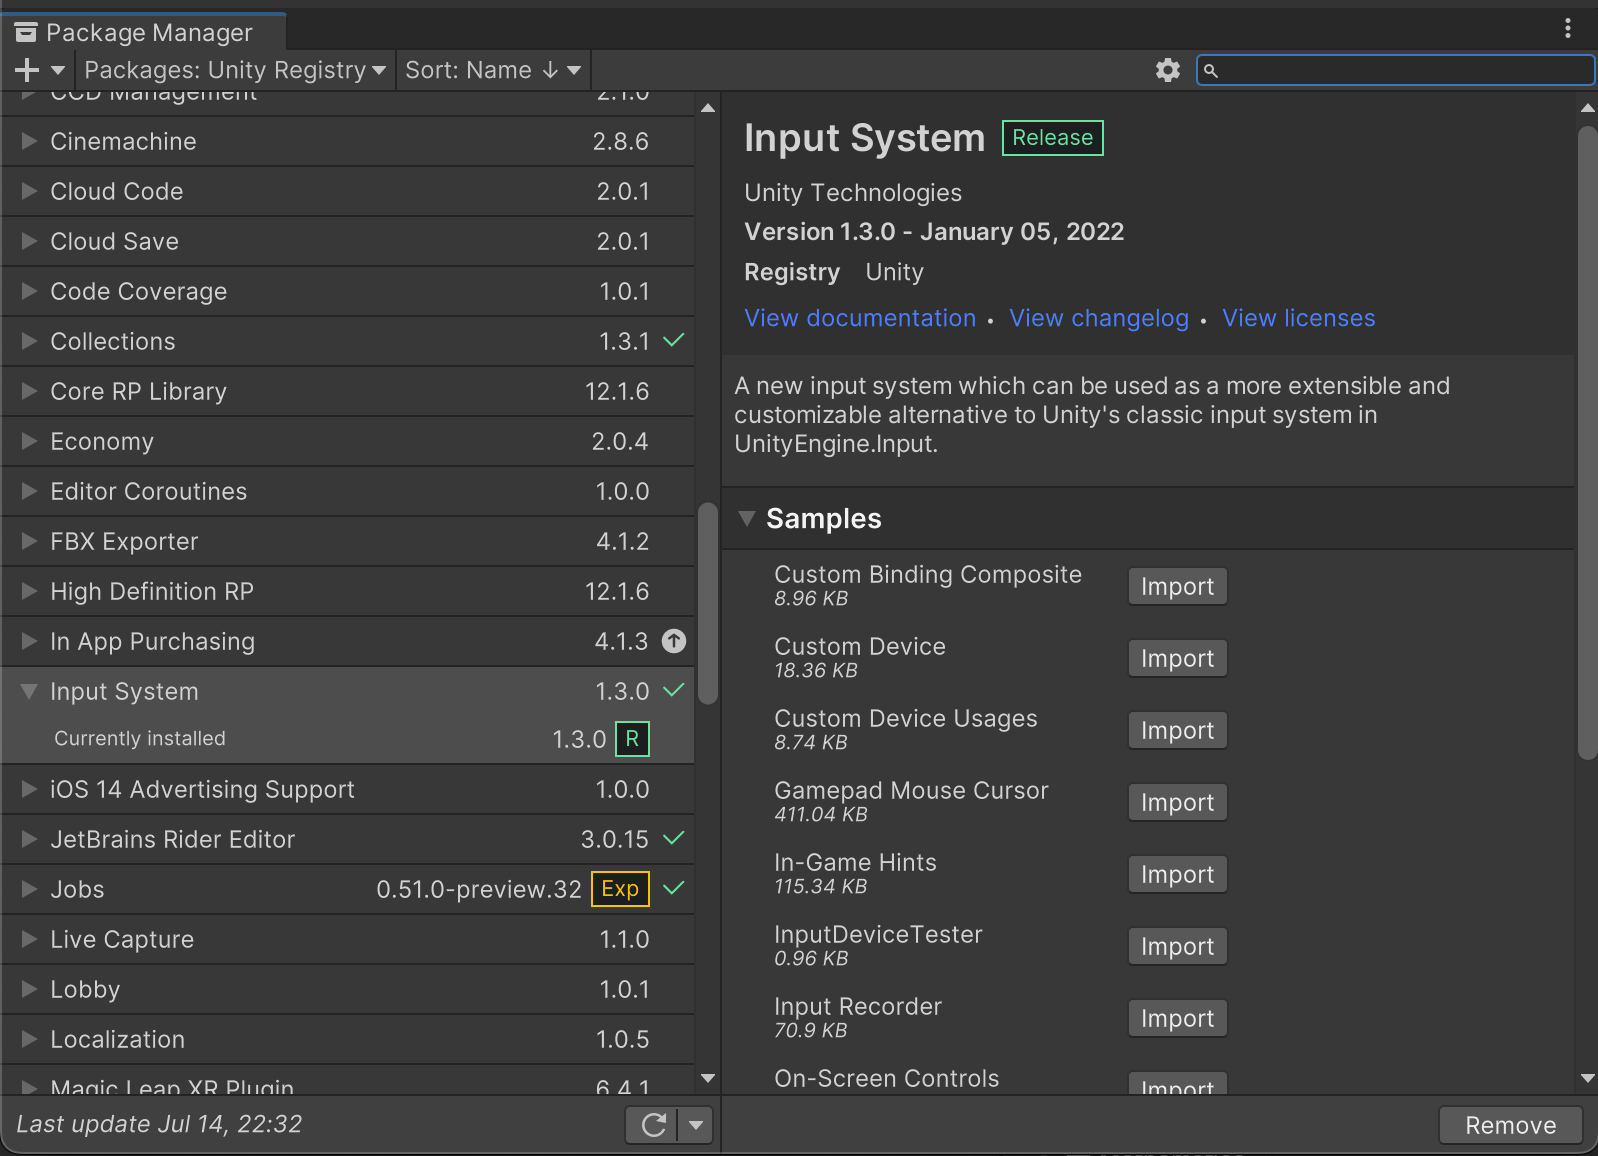
Install the Input System package via Package Manager > Unity Registry
Basics
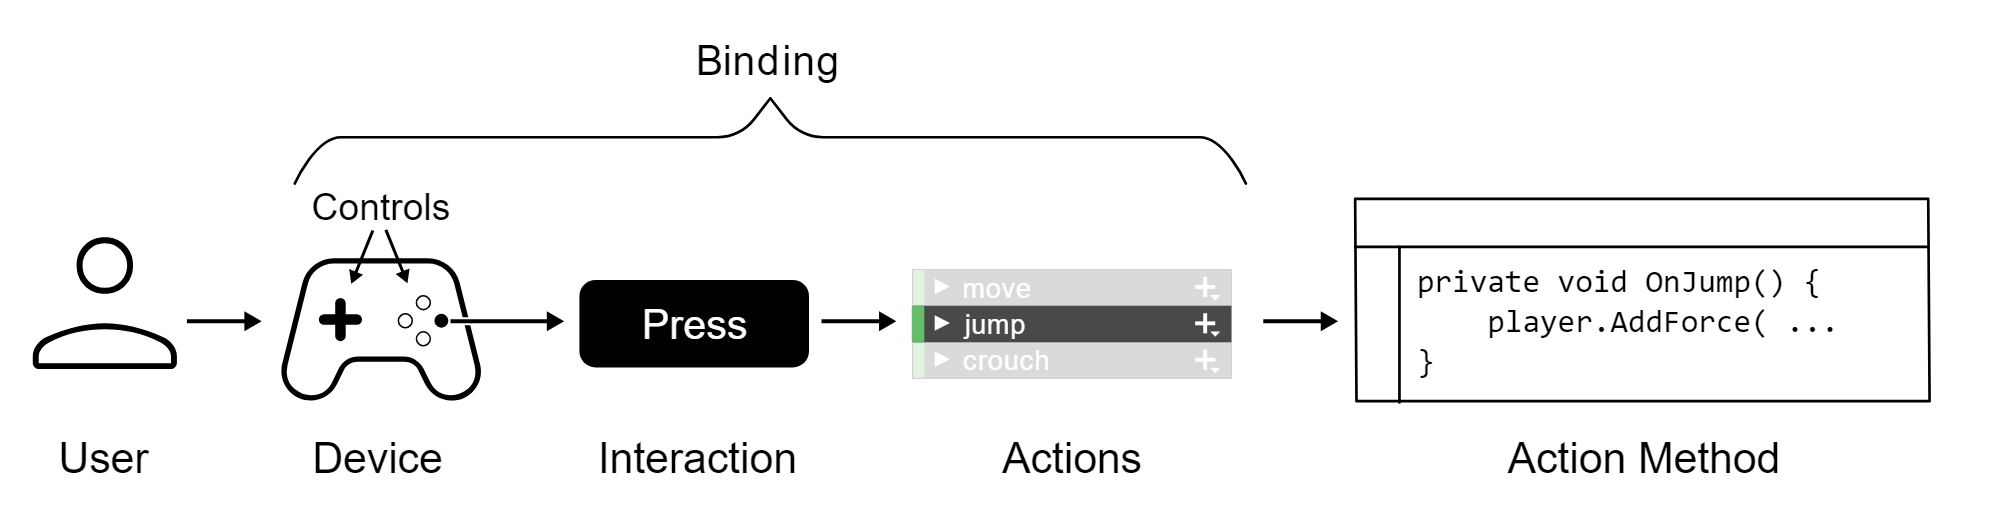
Workflows
Directly Reading Device State
This is the fastest, but least flexible way.
using UnityEngine;
using UnityEngine.InputSystem;
public class MyPlayerScript : MonoBehaviour {
    void Update() {
        var gamepad = Gamepad.current;
        if (gamepad == null) return; // No gamepad connected.

        if (gamepad.rightTrigger.wasPressedThisFrame) {
            // 'Use' code here
        }

        Vector2 move = gamepad.leftStick.ReadValue();
        // 'Move' code here
    }
}
Simple Pen Input Example
void Update()
    {
        var pen = Pen.current;
        if (pen == null) return;

        Debug.Log($"{pen.position.ReadValue()} > {pen.pressure.ReadValue()}");
    }
Embedded Actions
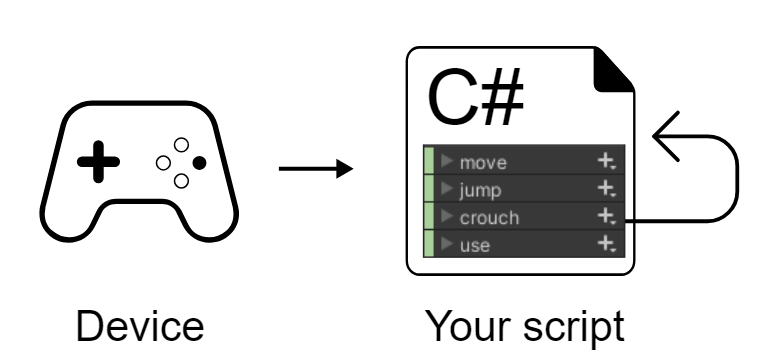
You can use the InputAction class in your script to define actions in your script. This adds a layer of abstraction between your actual action code or methods, and the bindings to specific device controls.
This means that instead of directly reading device states, you do not specify explicitly which controls (such as a gamepad trigger or stick) should do what in your code. Instead you create Actions, bind them to controls, and respond to the states or values from your Actions in your code.
When you make a public InputAction field in a MonoBehaviour script, it displays in the inspector as a configurable field. The configurable field UI allows you to create a binding for the action. For example, here are two Actions defined using the InputAction class in a script:
using UnityEngine;
using UnityEngine.InputSystem;

public class ExampleScript : MonoBehaviour {
    public InputAction move;
    public InputAction jump;
}
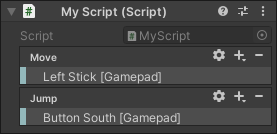
using UnityEngine;
using UnityEngine.InputSystem;

// Using embedded actions with callbacks or reading values each frame.

public class ExampleScript : MonoBehaviour {
    // these embedded actions are configurable in the inspector:
    public InputAction moveAction;
    public InputAction jumpAction;

    public void Awake() {
        // assign a callback for the "jump" action.
        jumpAction.performed += ctx => { OnJump(ctx); };
    }

    public void Update() {
        // read the value for the "move" action each frame.
        Vector2 moveAmount = moveAction.ReadValue<Vector2>();
    }

    public void OnJump(InputAction.CallbackContext context) {
        // jump code goes here.
    }

    // the actions must be enabled and disabled
    // when the GameObject is enabled or disabled

    public void OnEnable() {
        moveAction.Enable();
        jumpAction.Enable();
    }

    public void OnDisable() {
        moveAction.Disable();
        jumpAction.Disable();
    }
}
Actions Asset
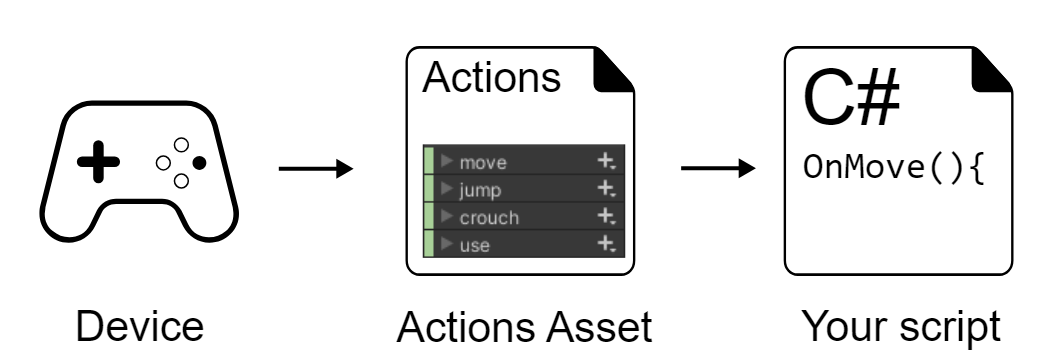
The Actions Asset provides a way to define, group, and manage sets of actions as data stored in an asset, instead of defining them directly in your code.
The Actions Asset is useful because it means all your action definitions are stored as a single asset file, separate from your scripts and prefabs.
Action Assets also provide other benefits over embedded actions in scripts, such as the ability to group actions into Action Maps and Control Schemes.
Action Maps are a way to group related actions together, where each map relates to a different situation. For example, your game might involve driving vehicles and navigating on foot, and may have in-game menus. In this example, it would make sense to have three different action maps for each of these three situations, and your game code would switch between them as appropriate. The actions grouped into the "driving" action map might be called "steer", "accelerate", "brake", "handbrake", etc, whereas the actions grouped into the "on foot" action map might be "move", "jump", "crouch", "use", etc.
The Control Schemes, also defined in an Action Asset, allows you to specify which bindings belong to the control schemes you define. You might have one control scheme which is "Joypad", and another control scheme which is "Keyboard and Mouse". This allows you to determine which control scheme the user is currently using, so your game can respond to the user accordingly. This feature is often used to adapt the in-game UI to show the correct keys or buttons in on-screen prompts.
Helpful: Input Debugger!
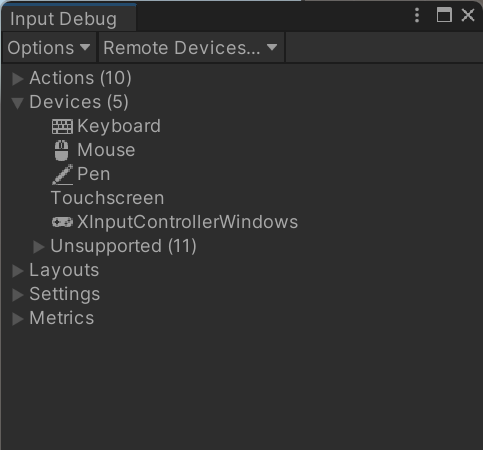
Test
-
Create Input Actions asset
-
Edit Asset
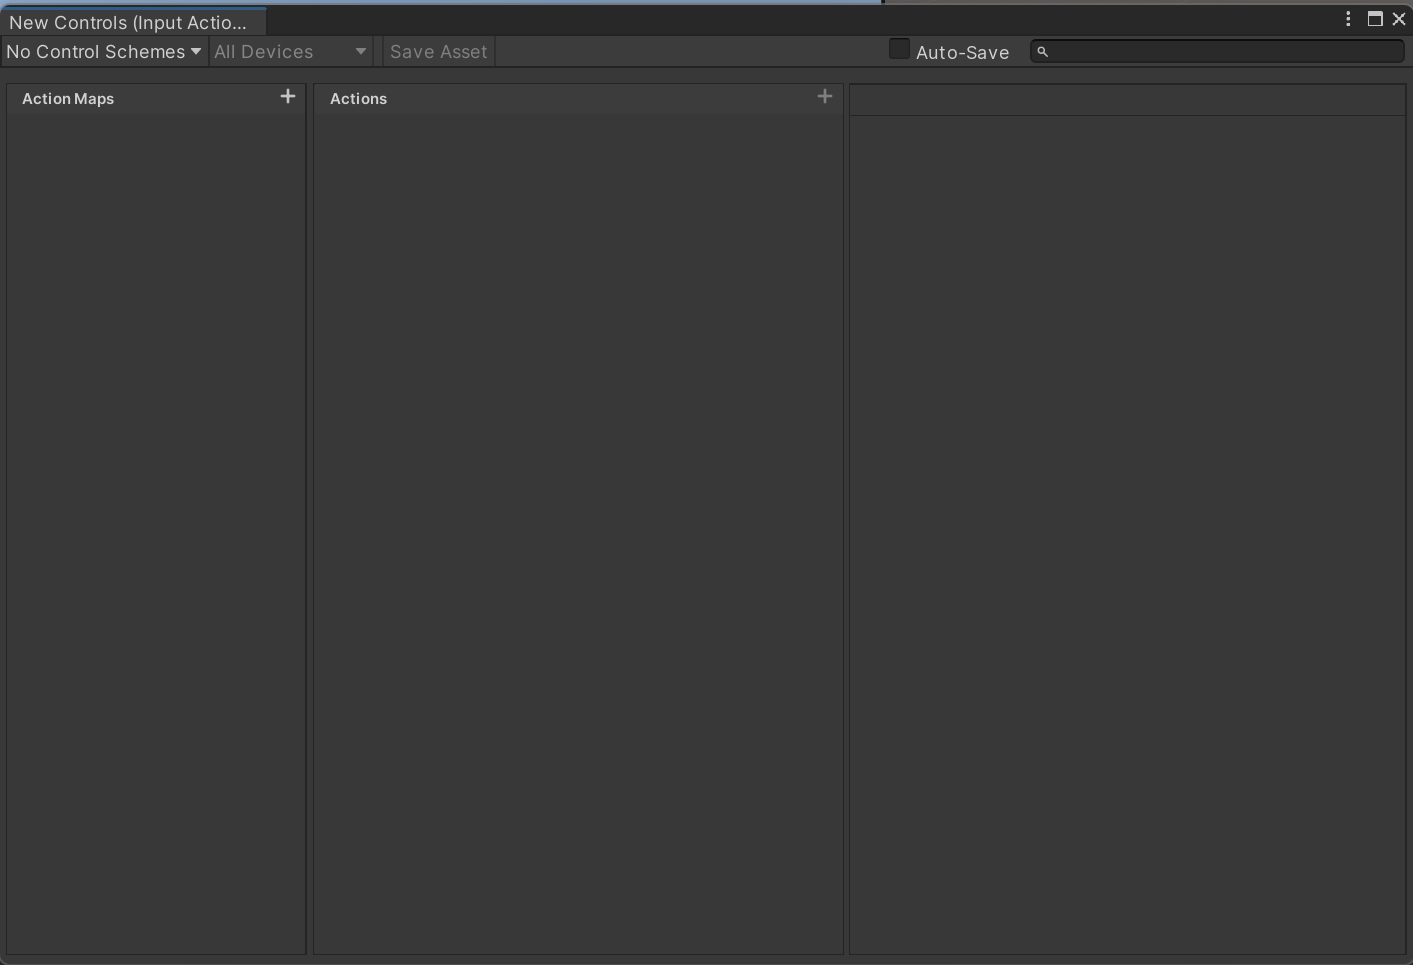
-
Add new Control Scheme “Keyboard” and add “Keyboard” as a requirement
-
Add new Control Scheme “XBox Controller” and add “XBox Controller” as a requirement
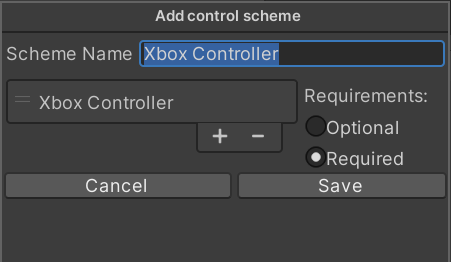
- Set up some stuf
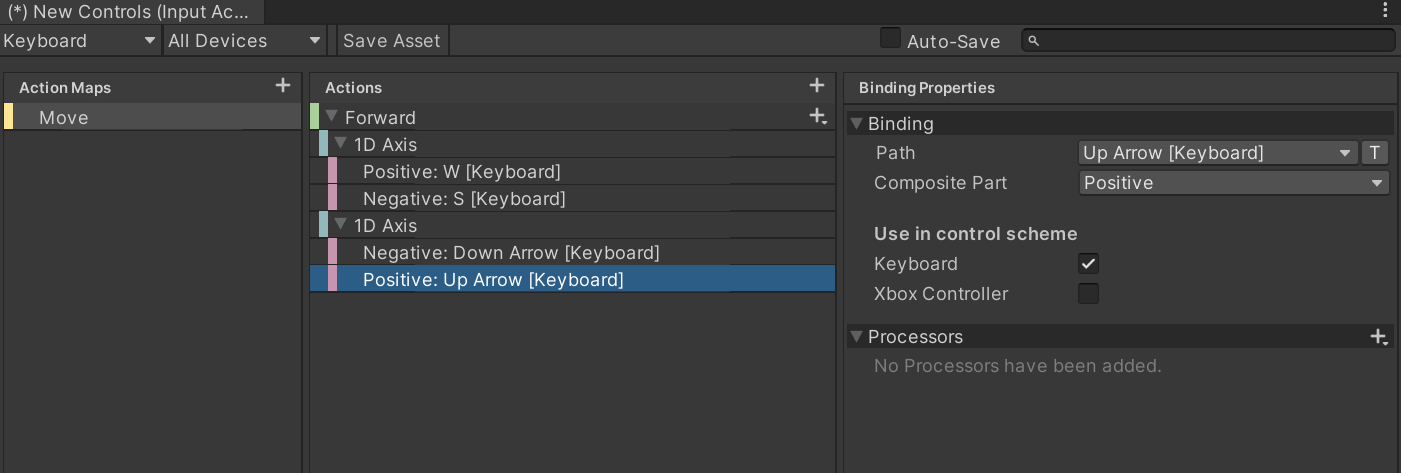
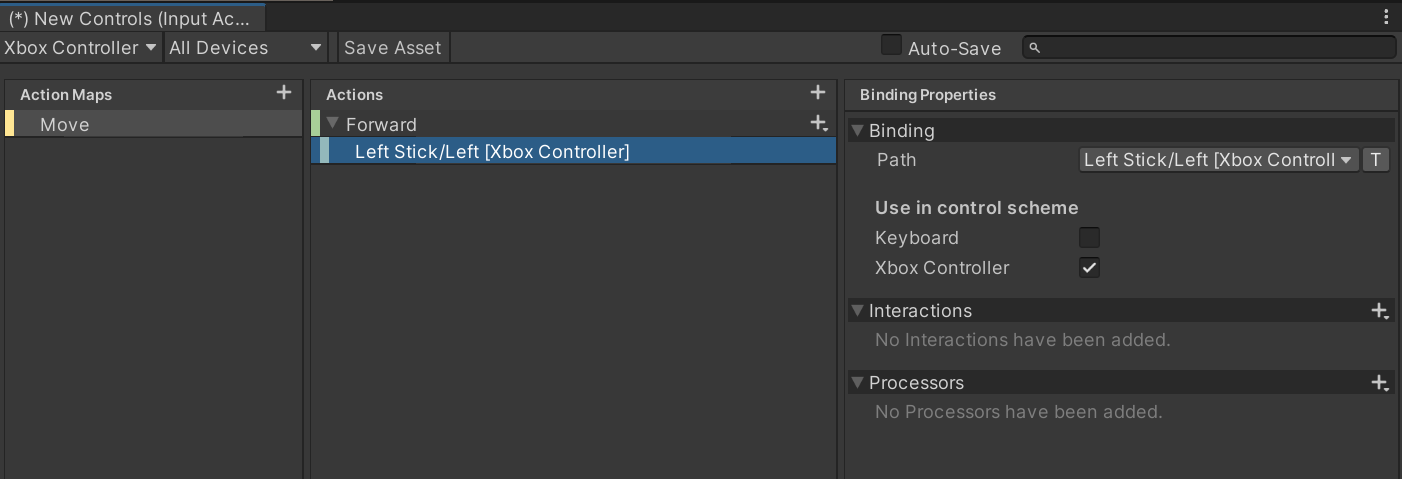
-
Check “Generate C# Class” on the Input Action Asset
-
Option 1: Make a test script and sign up to stuff directly
- Use the generated C# class
void Start() {
    var input = new BoxControls(); // instantiate the generated class
    input.Move.Enable(); // IMPORTANT! ActionMaps are off by default, so you need to enable the ones you want to use!

		input.Move.Forward.performed += ForwardOnPerformed;
	  input.Move.Forward.canceled += ForwardOnCanceled;
 }
- get a value and use it
private void ForwardOnPerformed( InputAction.CallbackContext obj ) {
    Debug.Log( "Forward" );
    _move = obj.ReadValue<float>();
 }
-
then use the value(s) you get to move stuff around
-
Option 2: Generated class + Interface 🏆 ← Best appraoch
- Callbacks via auto-generated Interface +
SetCallbacks()
- Callbacks via auto-generated Interface +
public class SpaceshipControl : MonoBehaviour, SpaceshipInput.IPlayerActions { ]
	// IPlayerActions was auto-generated for my "Player" ActionMap - yours will be called differently and you might have multiple
	// Let Rider auto-generate the Callback functions for you

	private void Start() {
		SpaceshipInput input = new SpaceshipInput(); // instantiate the auto-generated class
		input.Player.Enable(); // ENABLE the ActionMap
		input.Player.SetCallbacks( this ); // Sign us up for callbacks!
	}

	public void OnBoost( InputAction.CallbackContext context ) {
		Debug.Log( $"Boost: {context.ReadValue<float>()} {context.ReadValueAsButton()}"  );
	}
}
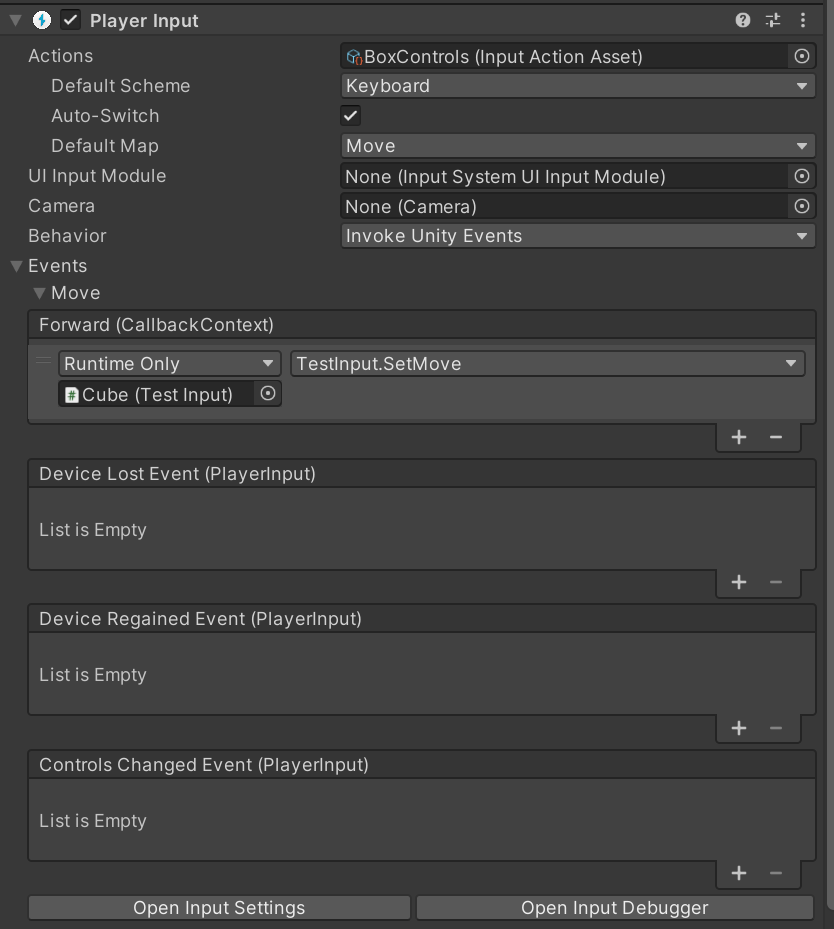
- Option 2: PlayerInput component
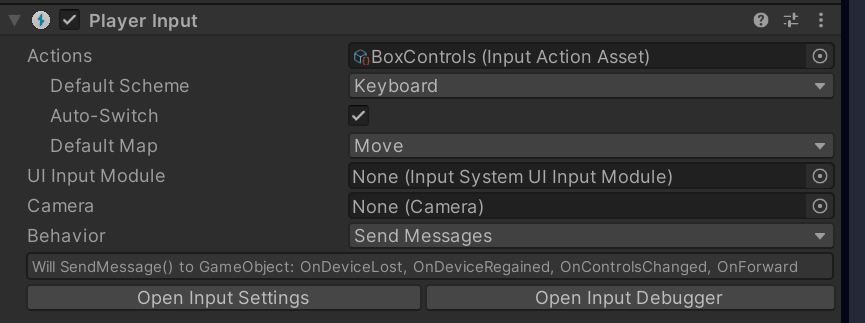
- Set it to Invoke Unity Events and set it up to call a function you make
public void SetMove( InputAction.CallbackContext obj  ) {
   _move = obj.ReadValue<float>();
}
Local Multiplayer
The easiest way is to use PlayerInputManager
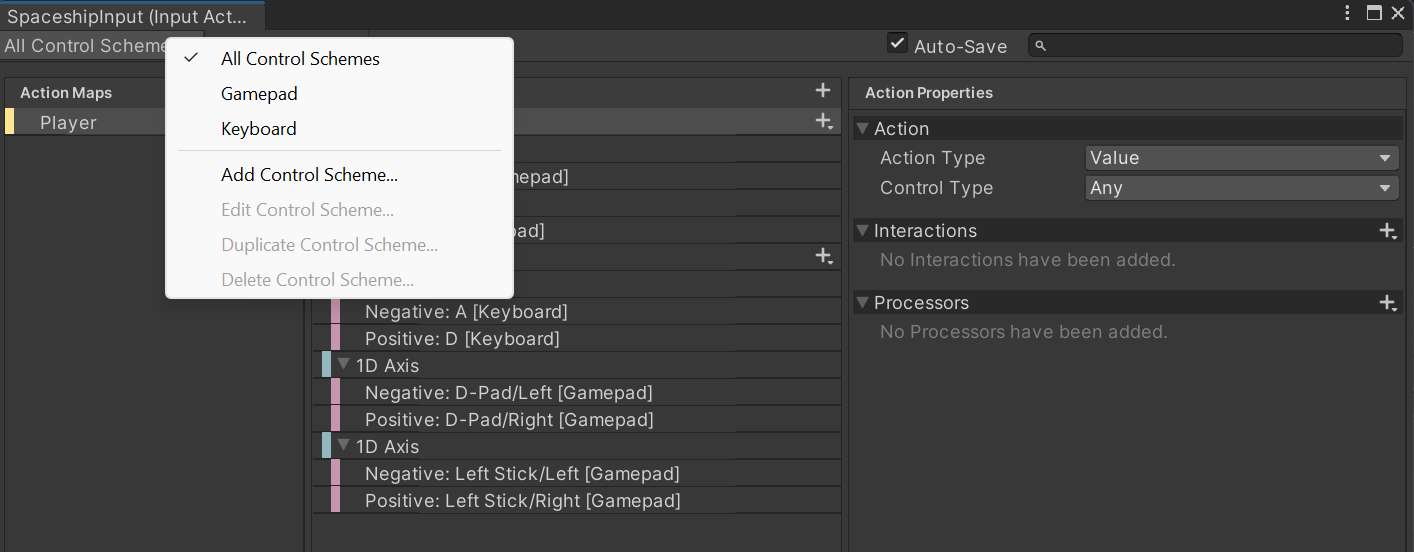
Set up multiple Control Schemes (I’ve got Gamepad and Keyboard schemes in this example)
Make a prefab with controls - basically what should be handed to one player to controlPut the PlayerInput component on it and set it up to send messages to your stuff.
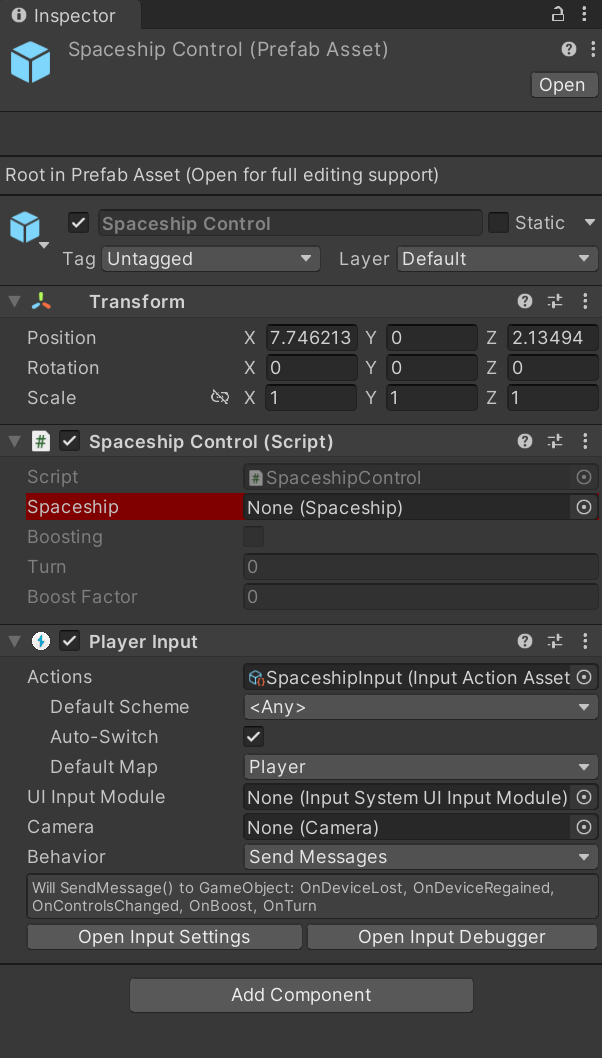
- Be aware that Send Messages and Broadcast Messages* require different functions than the generated class + Interface* approach from above. (
InputValueargument instead ofCallbackContext)
public void OnBoost( InputValue value ) {
	m_BoostFactor = value.Get<float>();
}
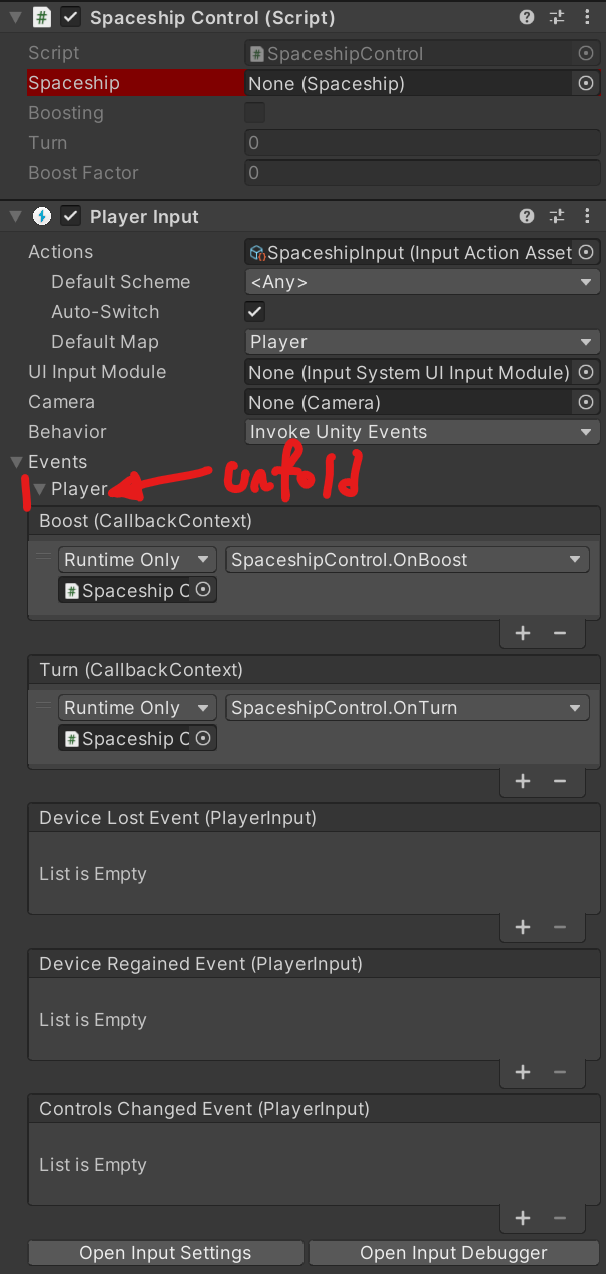
- *Invoke Unity Events *uses the same events as the generated class + Interface approach from above, but you need to assign them each manually (unfold each ActionMap)
public void OnBoost( InputAction.CallbackContext context ) {
	m_BoostFactor = context.ReadValue<float>();
}
Now assign that prefab to PlayerInputManager to be spawned when a new player joins
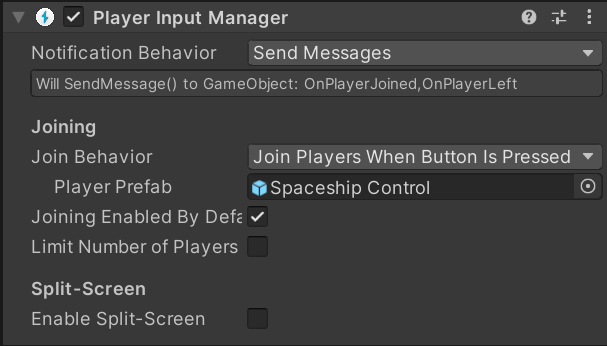
Now whenever a player presses a button on a new control scheme, they will get a prefab spawned and events will start flowing!
Interactions
Represent specific input patterns. For example, add a Hold Interaction to a key binding and it will only trigger after the Hold Time
If you don’t specify an interaction, there might still be a default interaction that gets applied.
**Press**: force button-like interactions and set up if it should trigger on Press, Release or Both
**Hold**: hold control for a duration before the Action triggers
**Tap**: Press and release within duration to trigger
**SlowTap**: Press and hold for minimum duration, then release to trigger
**MultiTap**: Press and release multiple times
Custom - you can write custom Interactions! Implement the IInputInteraction interface
Processors
A Processor takes a value and returns a processed result for it.
You can put them on Bindings or Actions
Clamp: clamp a value between min .. max range
**Invert**: invert a value
**Invert Vector2**, **Invert Vector3**: choose to invert x/y/z
**Normalize**: Normalize a Vector2 or Vector3
**Scale Vector2**, **Scale Vector3**: Multiply by factor
**Axis Deadzone**: Smaller than min is 0, bigger than max is 1
**Stick Deadzone**: as above, but for Vector2
Custom - you can write custom Processors! Derive from InputProcessor
Layouts
A Layout represents a specific composition of Input Controls. - This is only needed if you want to change the behaviour of a specific device or want to add support for a new device.
https://docs.unity3d.com/Packages/com.unity.inputsystem@1.6/manual/Layouts.html
You can browse the existing Layouts in the Input Debugger.
UI Support
If you have the new Input system in your project, then the StandaloneInputModule shows a button to be replaced with the InputSystemUIInputModule.
https://docs.unity3d.com/Packages/com.unity.inputsystem@1.6/manual/UISupport.html
Leave a comment