Run your own Unity Package Server (QNAP NAS)
date
Jul 8, 2023
type
KnowledgeBase
year
slug
package-server-nas
status
Published
tags
Package Server
Unity
NAS
VM
Linux
summary
How to set up a verdaccio npm package server in Virtualization Station on your QNAP NAS
In a previous post I showed you how to run your own package server on the Google Cloud, but what if you have a QNAP NAS in your office and want to run it on there?
I explored 2 options:
- Running verdaccio on Ubuntu 22.04 in Virtualization Station
- Running verdaccio in a docker container in Container Station
The first approach works beautifully, the second one works only up until the point where the packages are supposed to show up in Unity - I’ll update this post if I ever figure out how to get the container-approach over the finishing line!
Anyway - here’s how I did it…
Unity Package Server in Virtualization Station
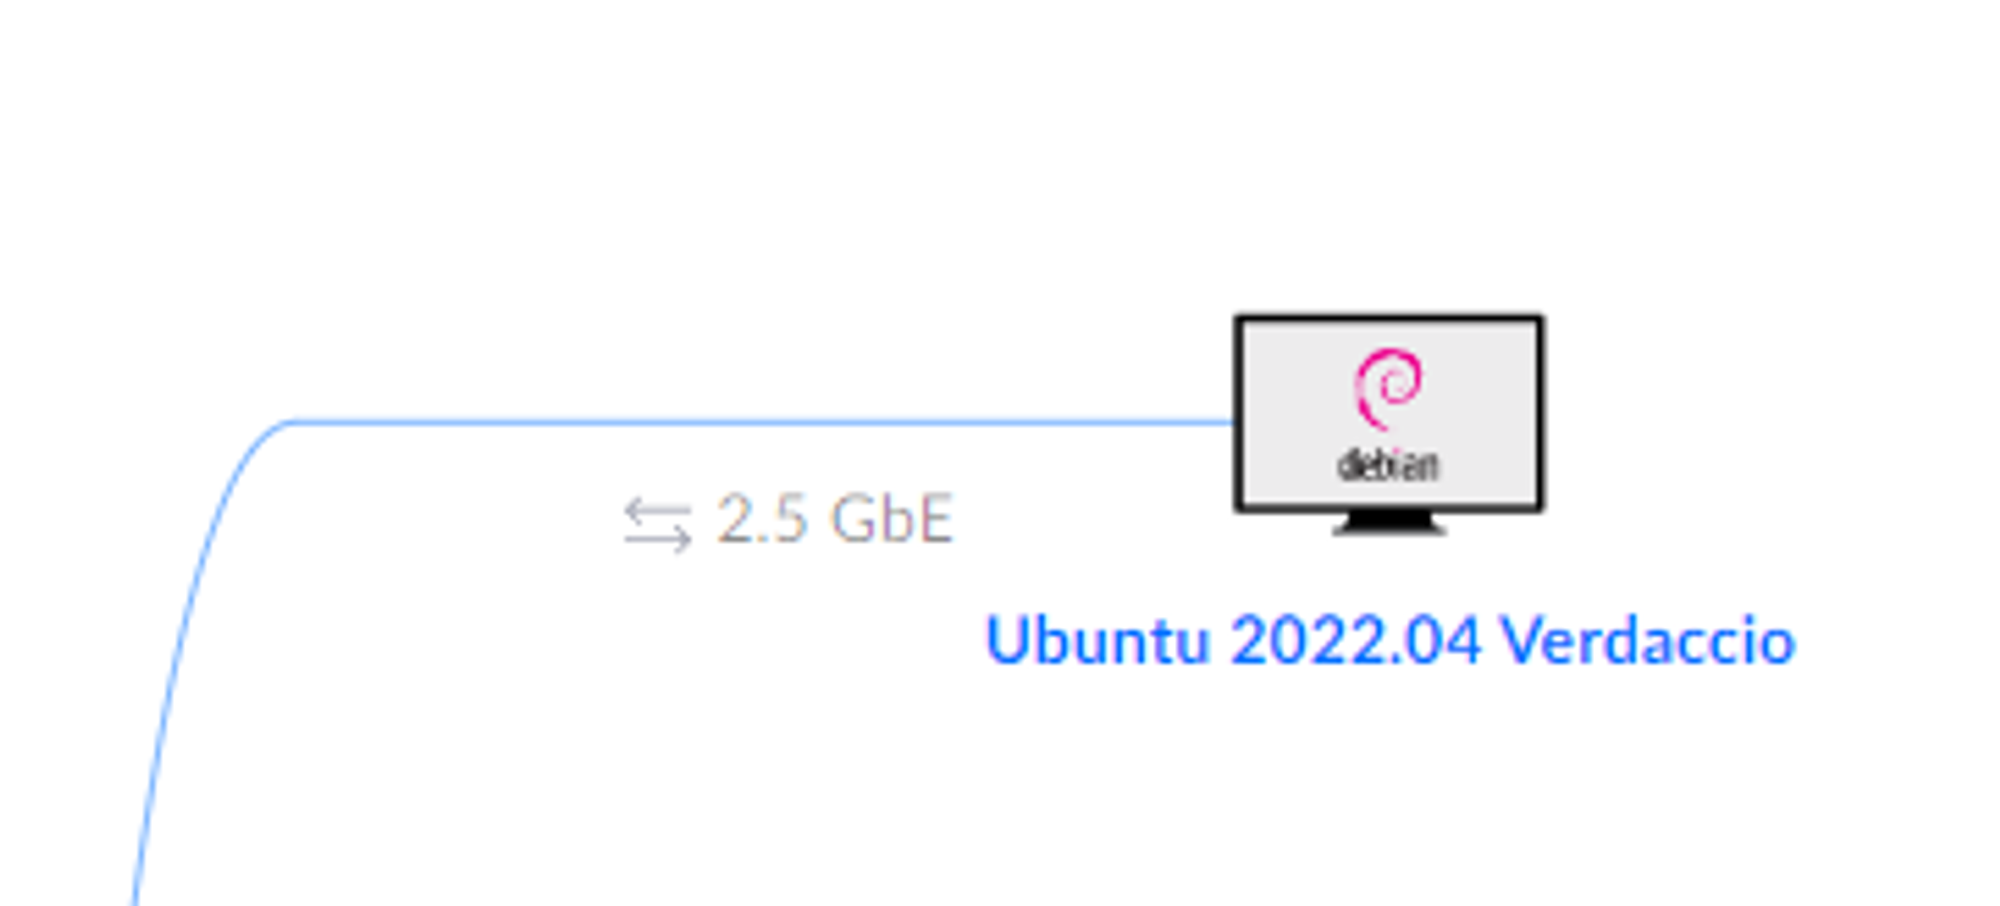
As a first step I logged into the QNAP NAS (I have a TS-664-4G) and created a VM in Virtualization Station, where I installed Ubuntu Server 22.04

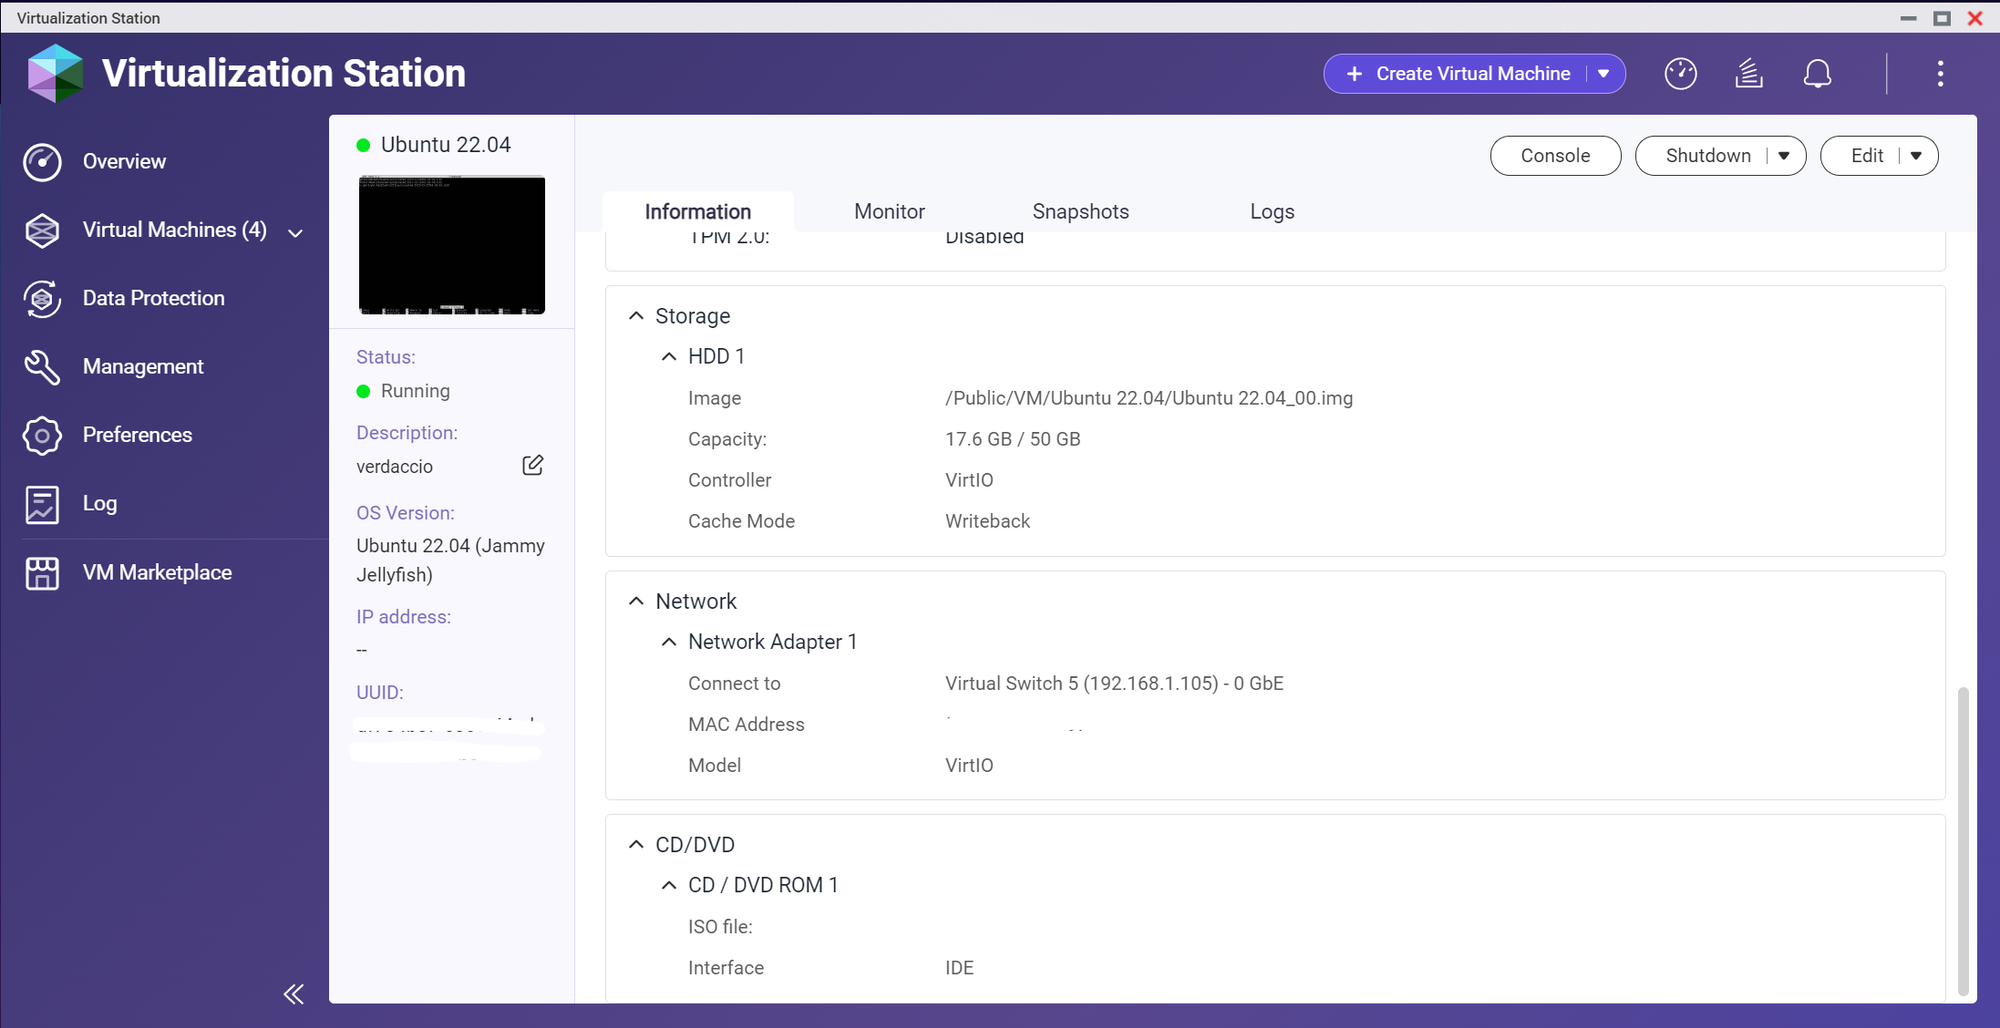
Next I launched the console of the VM and Installed verdaccio as per step 2 in the other blog post
And here’s what’s different:
Automatically starting verdaccio after server restart
Check the location of verdaccio:
$ which verdaccio

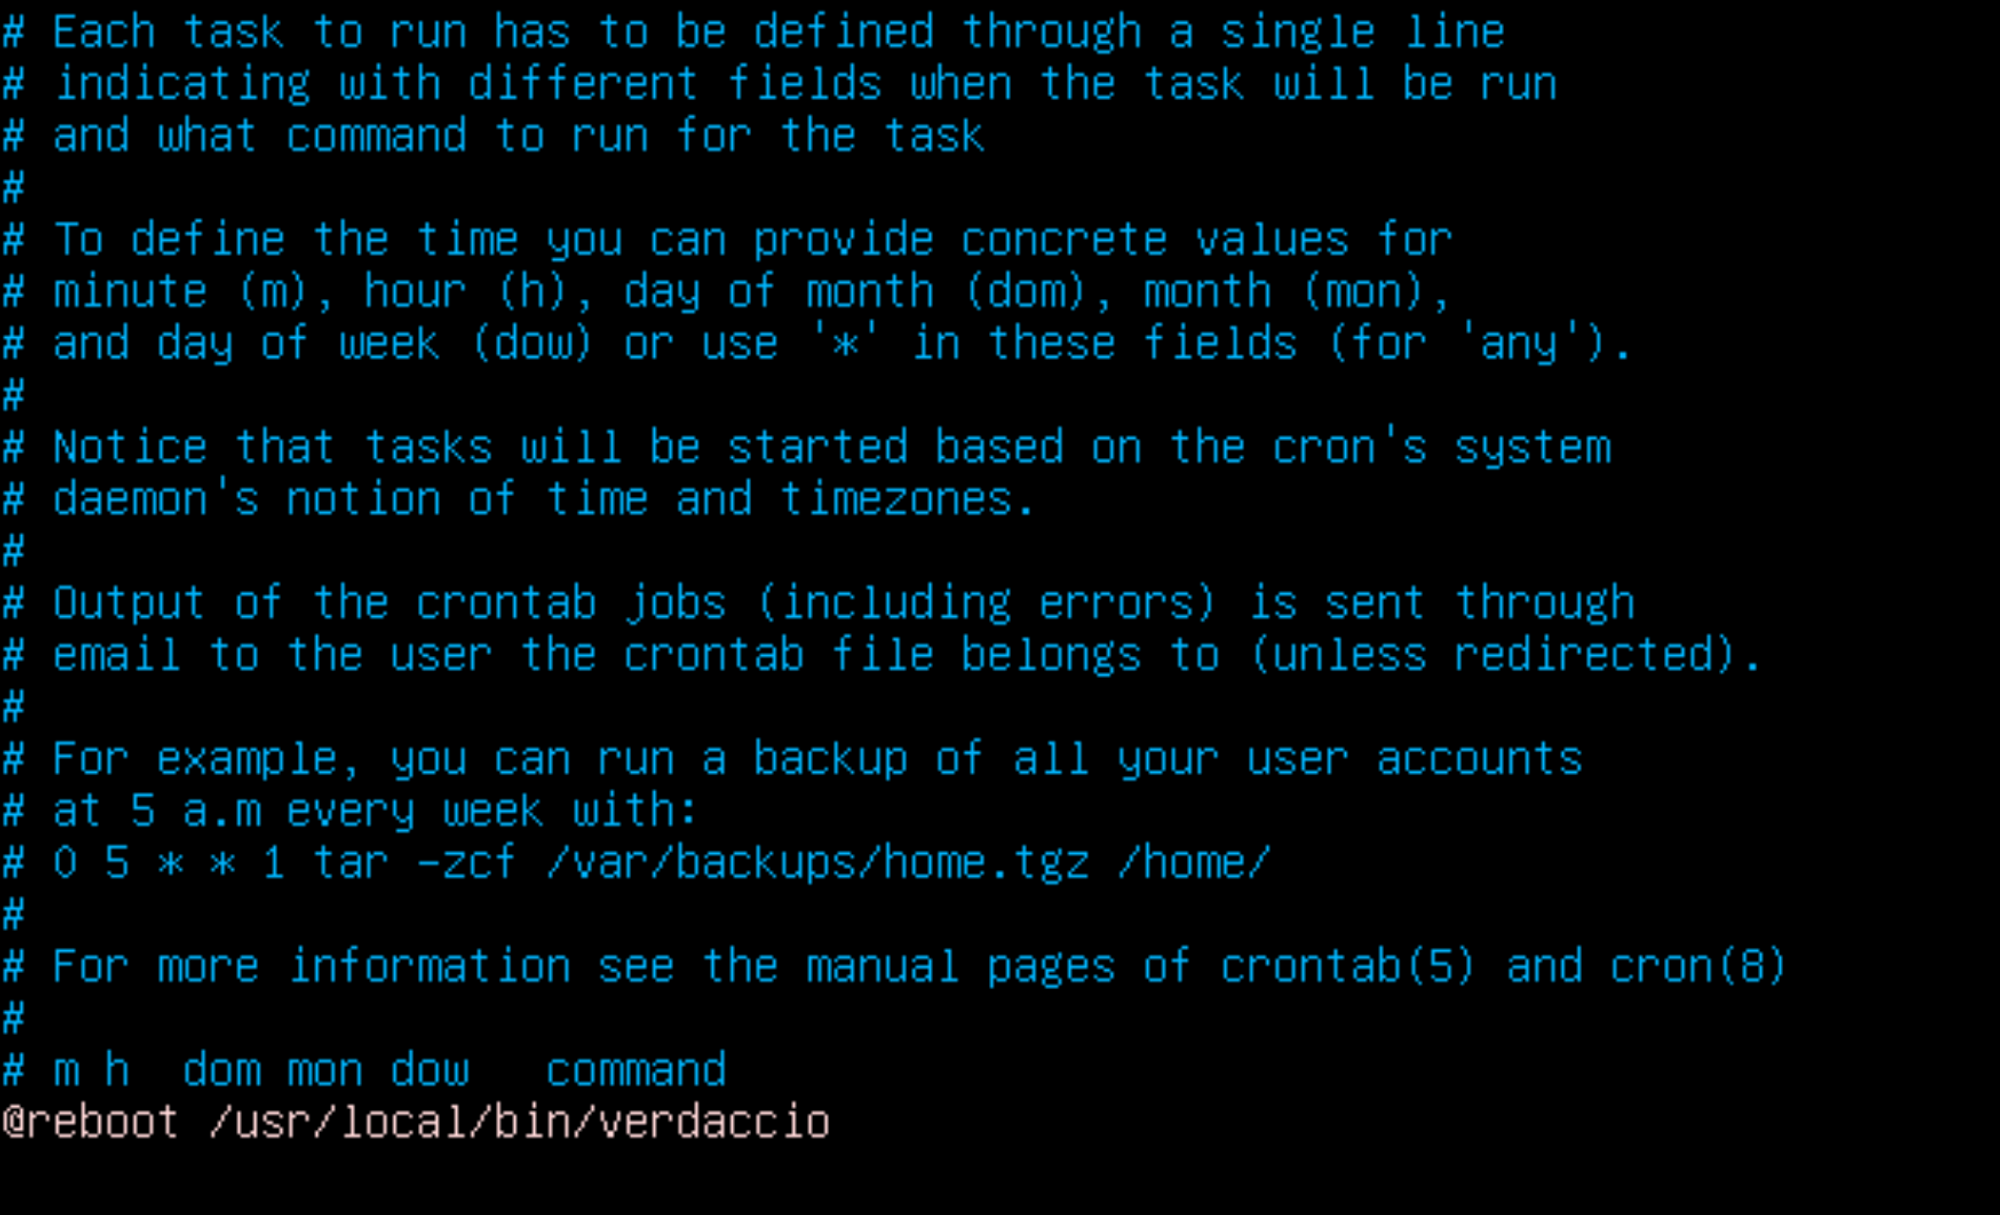
$ crontab -e (if it asks for your favourite editor, just pick nano)add one line to the bottom:
@reboot /usr/local/bin/verdaccio (or whatever location you got above)
CTRL + x to exit, asks if you want to save - you do.🔄 Restart the VM
Now we check if that worked and verdaccio automatically started after the reboot. We do this with
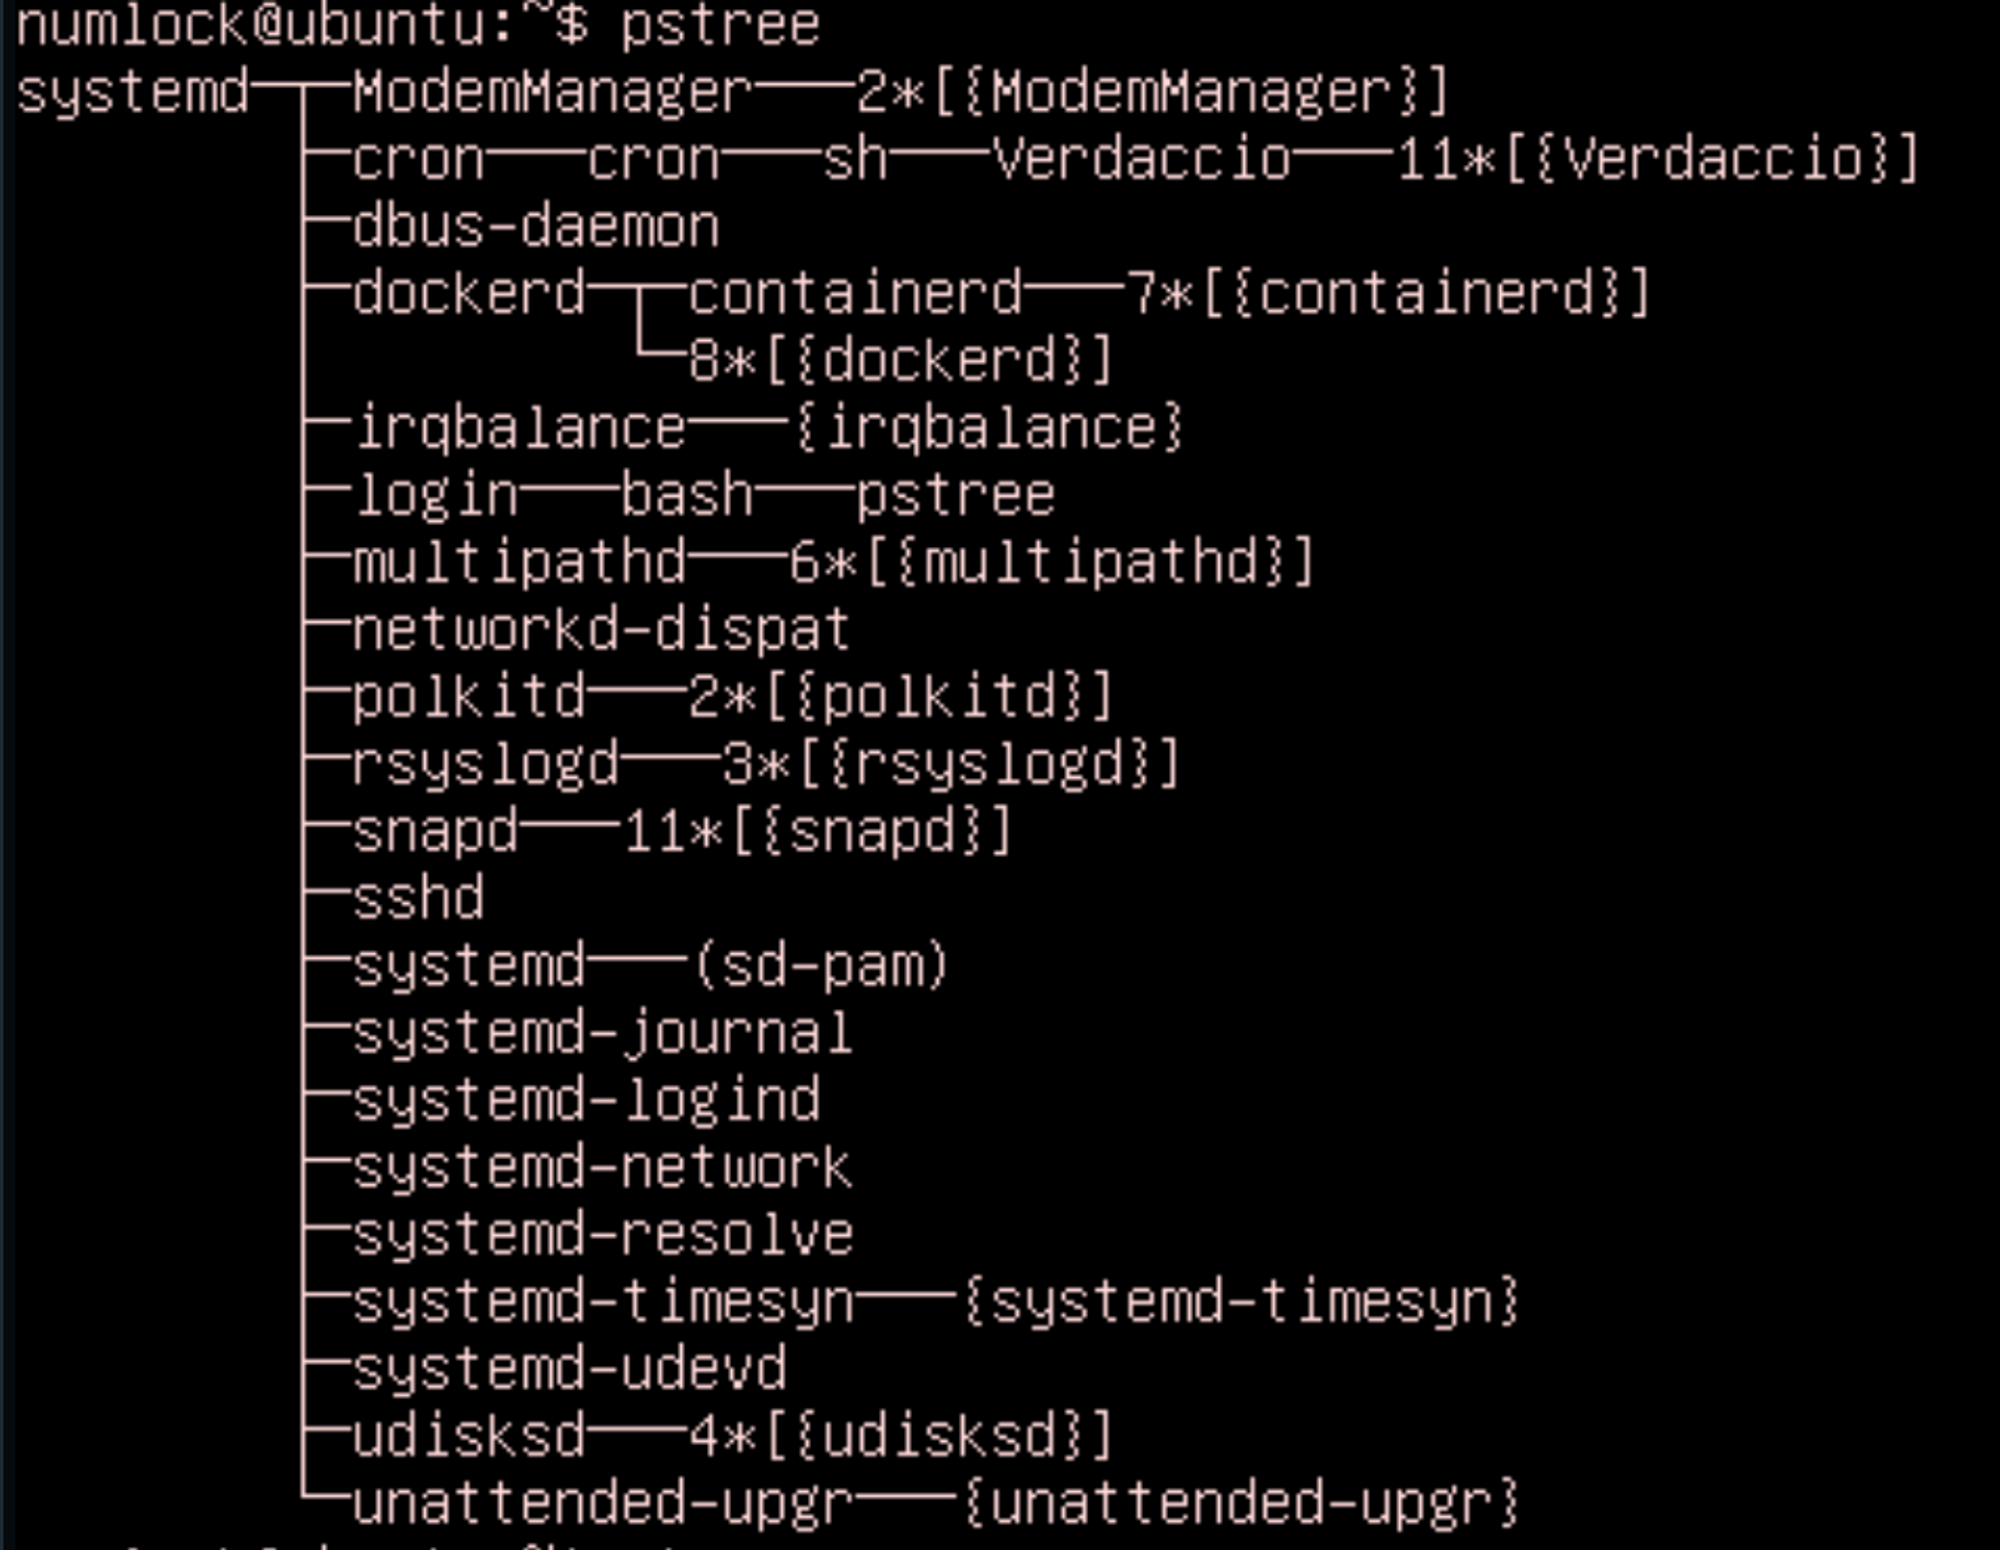
$ pstree - if it shows up in the list, we’re good! In the screenshot below you can see it as the second item from the top and we can even see that it was started by cron If it’s not showing up, then try and run it manually - then you will very likely see what error is preventing it from launching during startup!

We could also pipe
| the output of pstree into grep and filter for the word “Verdaccio” like this: $ pstree | grep Verdaccio - then we would only see the one line we actually care about.

How can we see the output from our auto-started verdaccio?
$ ps aux | grep verdaccio - gives us a filtered list of processes showing only entries with “verdaccio”

- Note the process id in there! (in my case
688)
- Now we can live-capture verdaccio’s stdout output like so:
$ sudo tail -f /proc/688/fd/1(CTRL+Cto exit)
- Or we can pipe it all into
lessand review it:$ sudo cat /proc/688/fd/1 | less(PG UP,PG DN,qto exit)
Optional: Local DNS Record
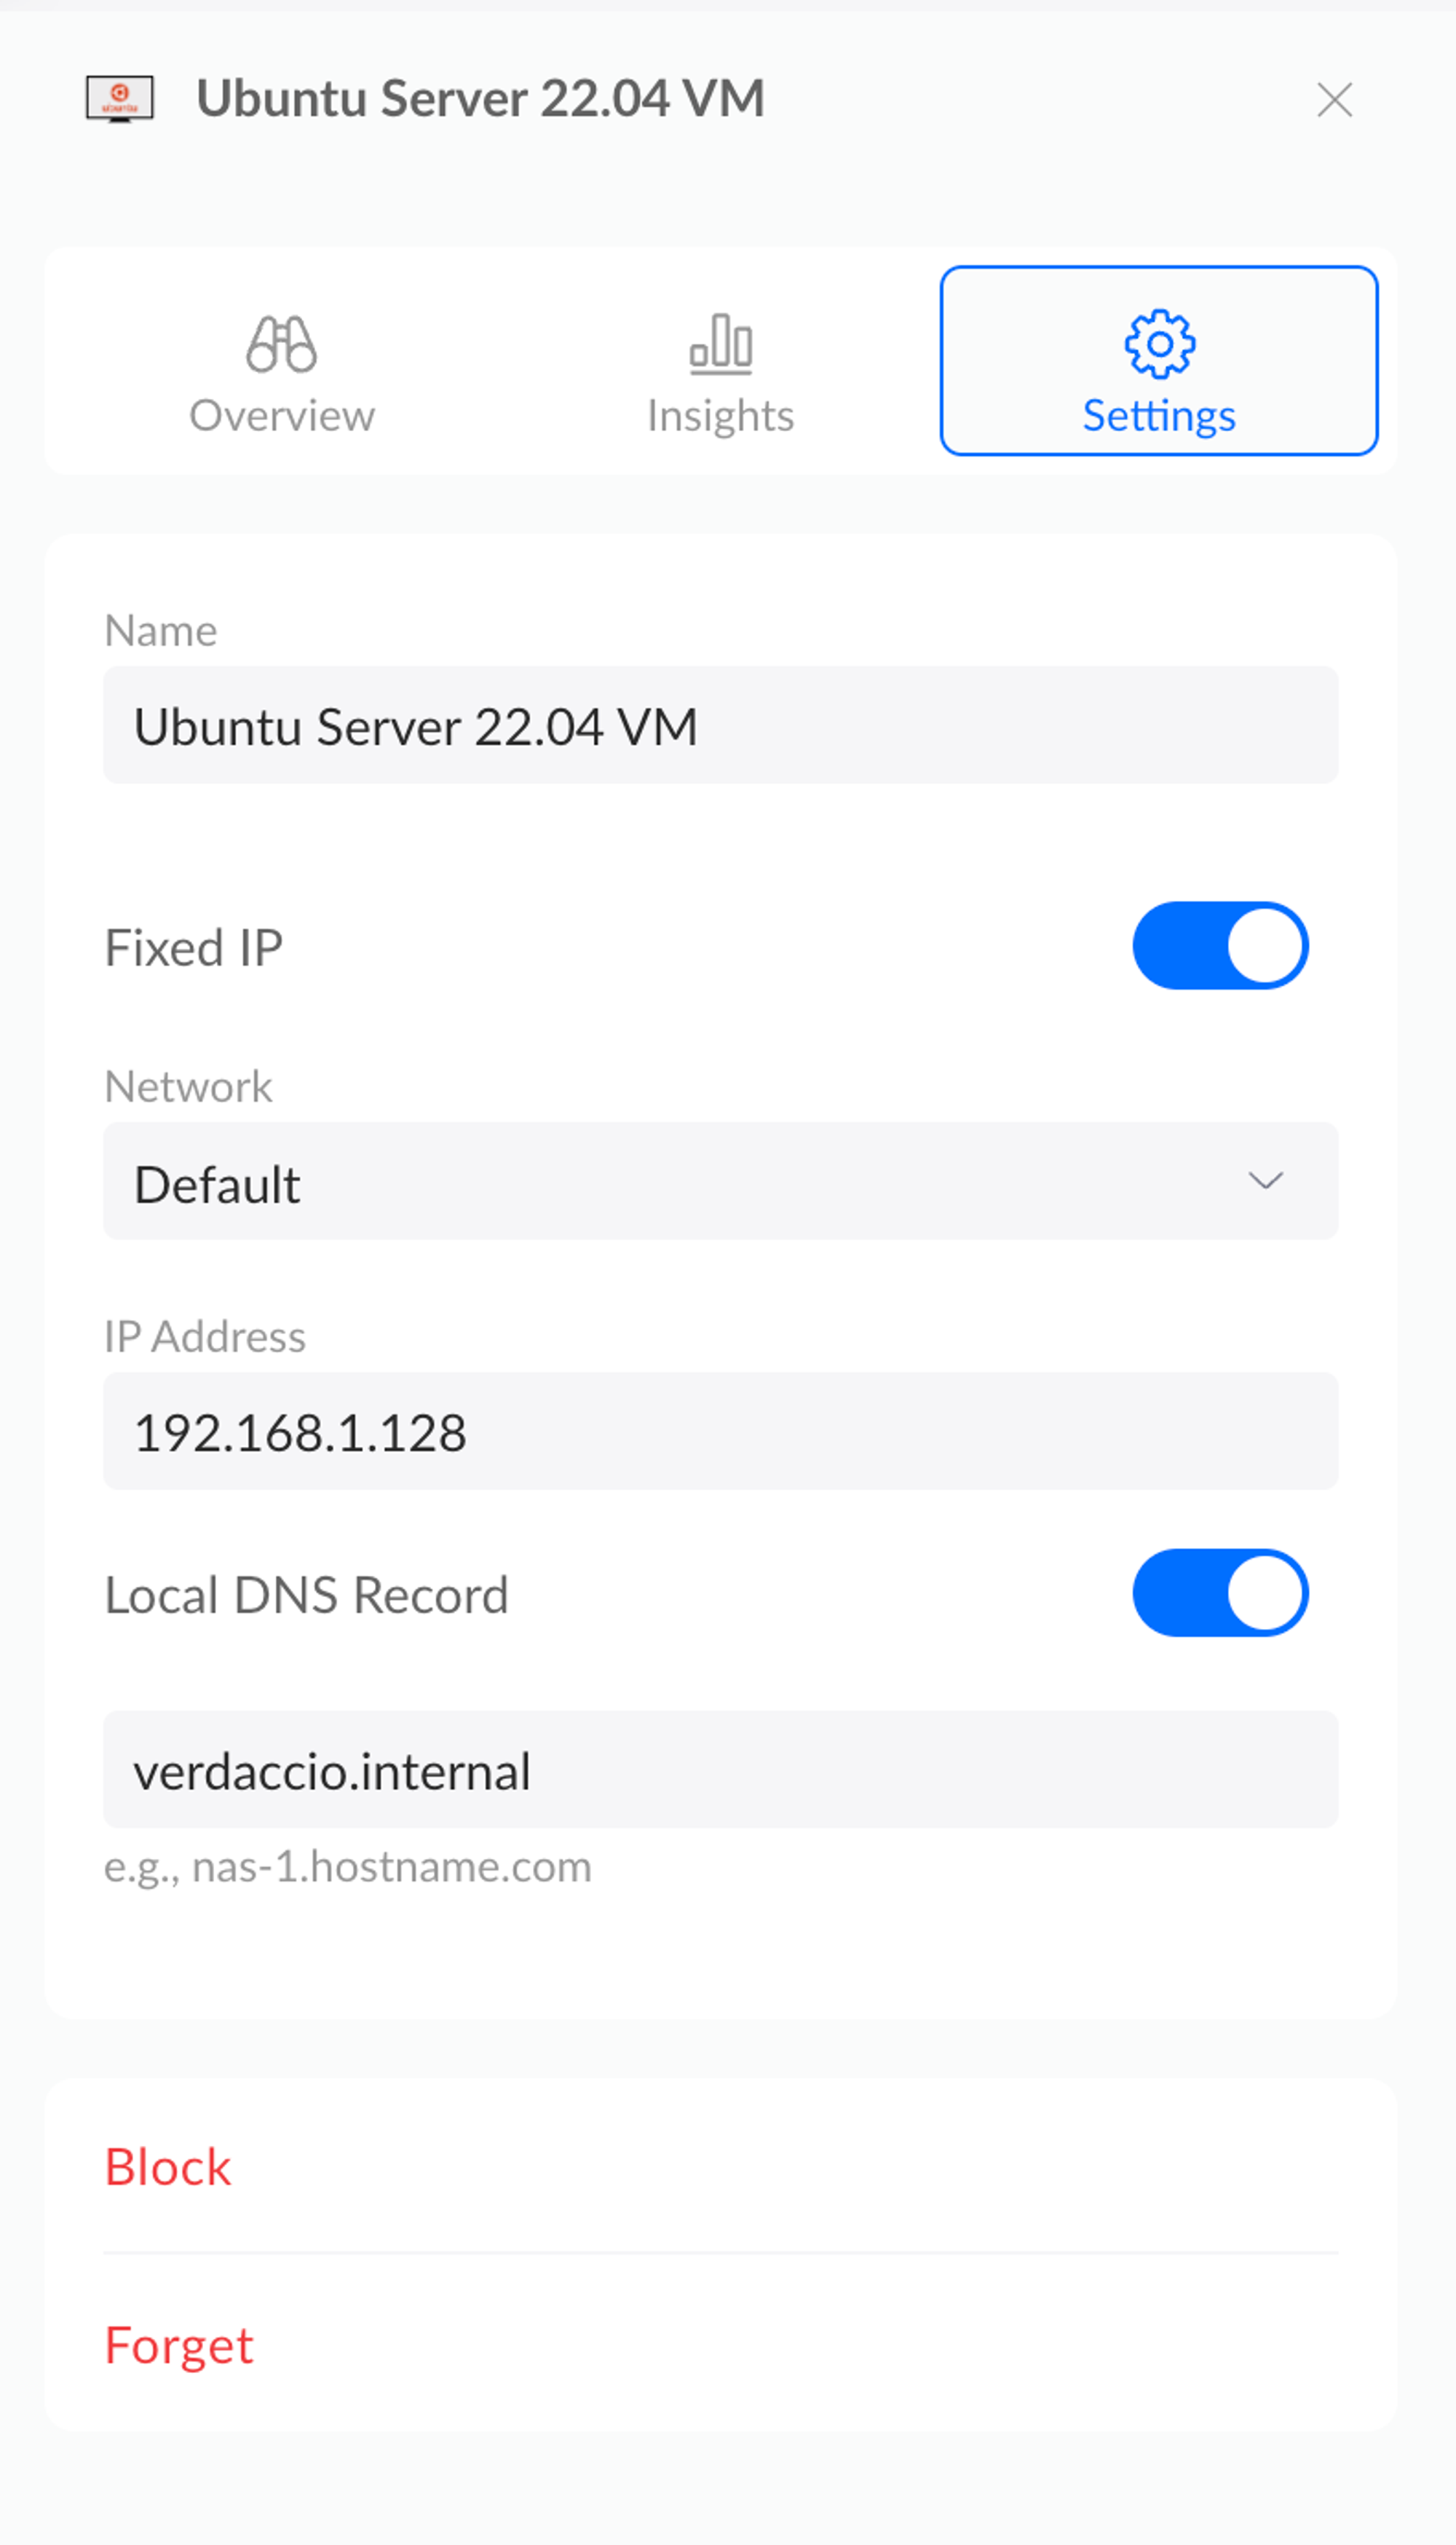
if you’re using a Ubiquiti router like the Dream Machine Pro, then the Ubuntu server should pop up under Topology in Unifi Console.

Click on it to show its details, switch to Settings and assign a local DNS record (like
verdaccio.internal). You probably also want to give it a Fixed IP.
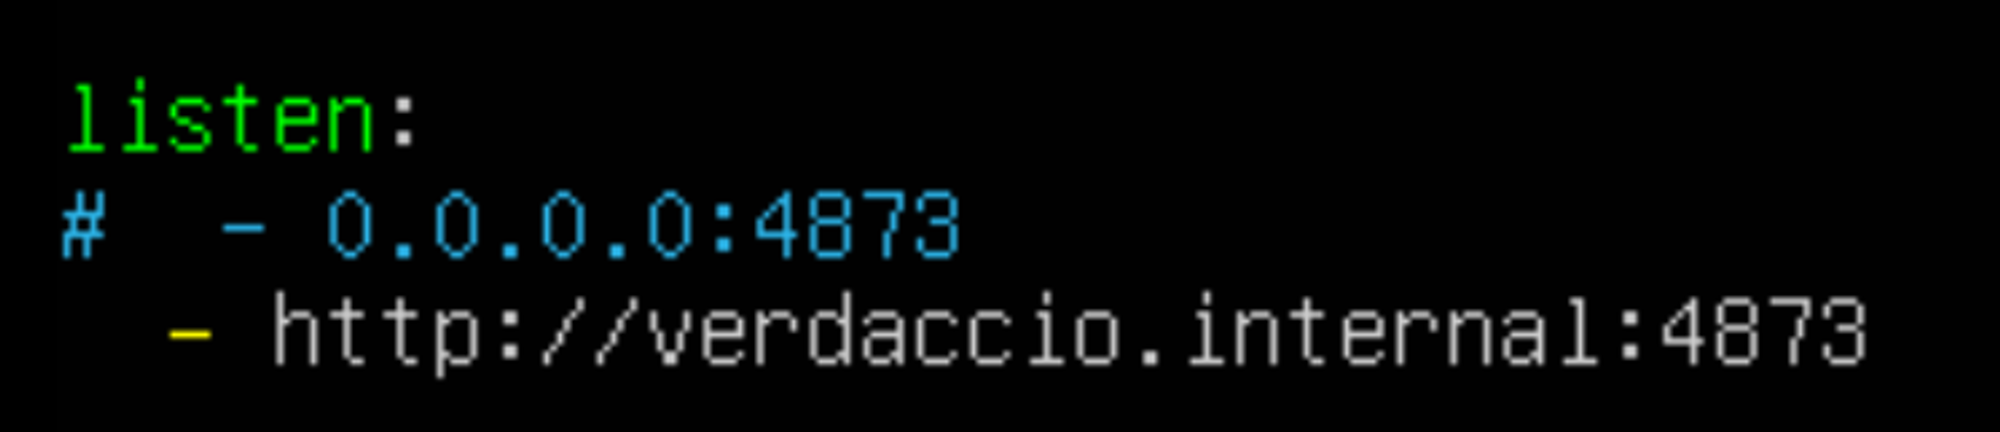
It might take a minute or so, but you should now be able to go to http://verdaccio.internal:4873 and see the web interface - but even if you have packages already in there it might say it’s empty.
To solve this open up the
config.yaml in nano again cd ~/verdaccio; sudo nano config.yaml and add your URI under listen:
Then restart your VM and it should work!
$ export VERDACCIO_PUBLIC_URL=http://verdaccio.internalRun Verdaccio via Docker in Container Station on QNAP NAS
Does not work yet. If you figure out how to make it work, please let me know!
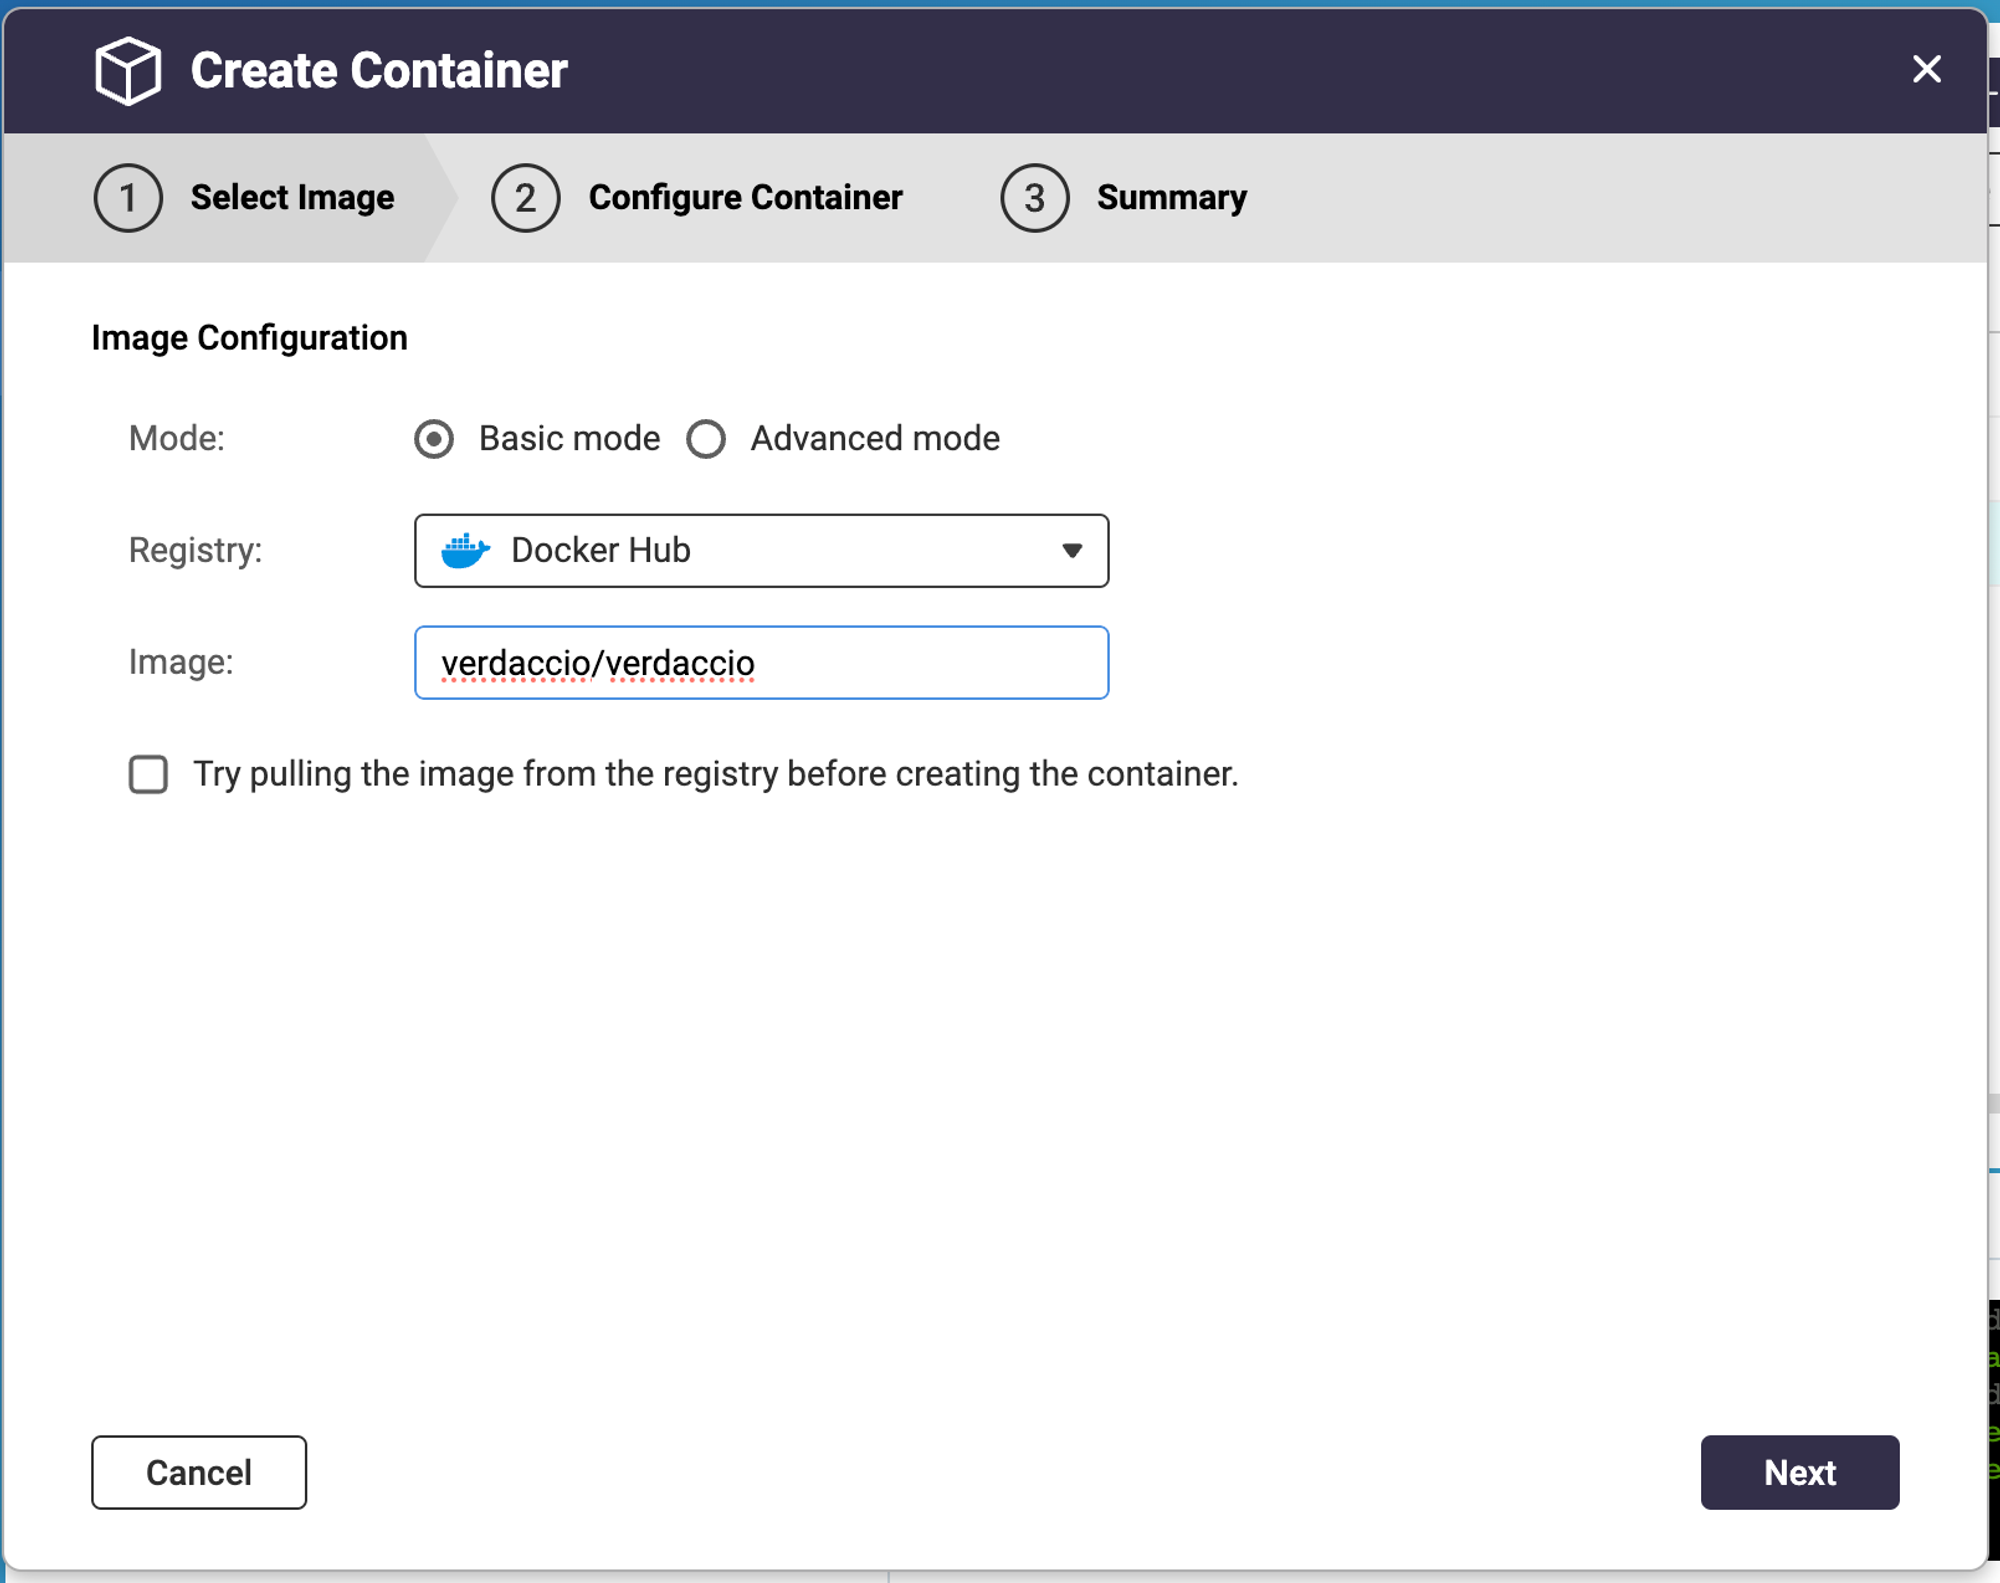
- Upgrade to Container Station 3 Beta
- Containers > Create
- Image:
verdaccio/verdaccio:5.9

- Advanced Settings > Storage
- Remove what’s there and add Bind Mount Host Path and point it at where you want the verdaccio content to live on your NAS.

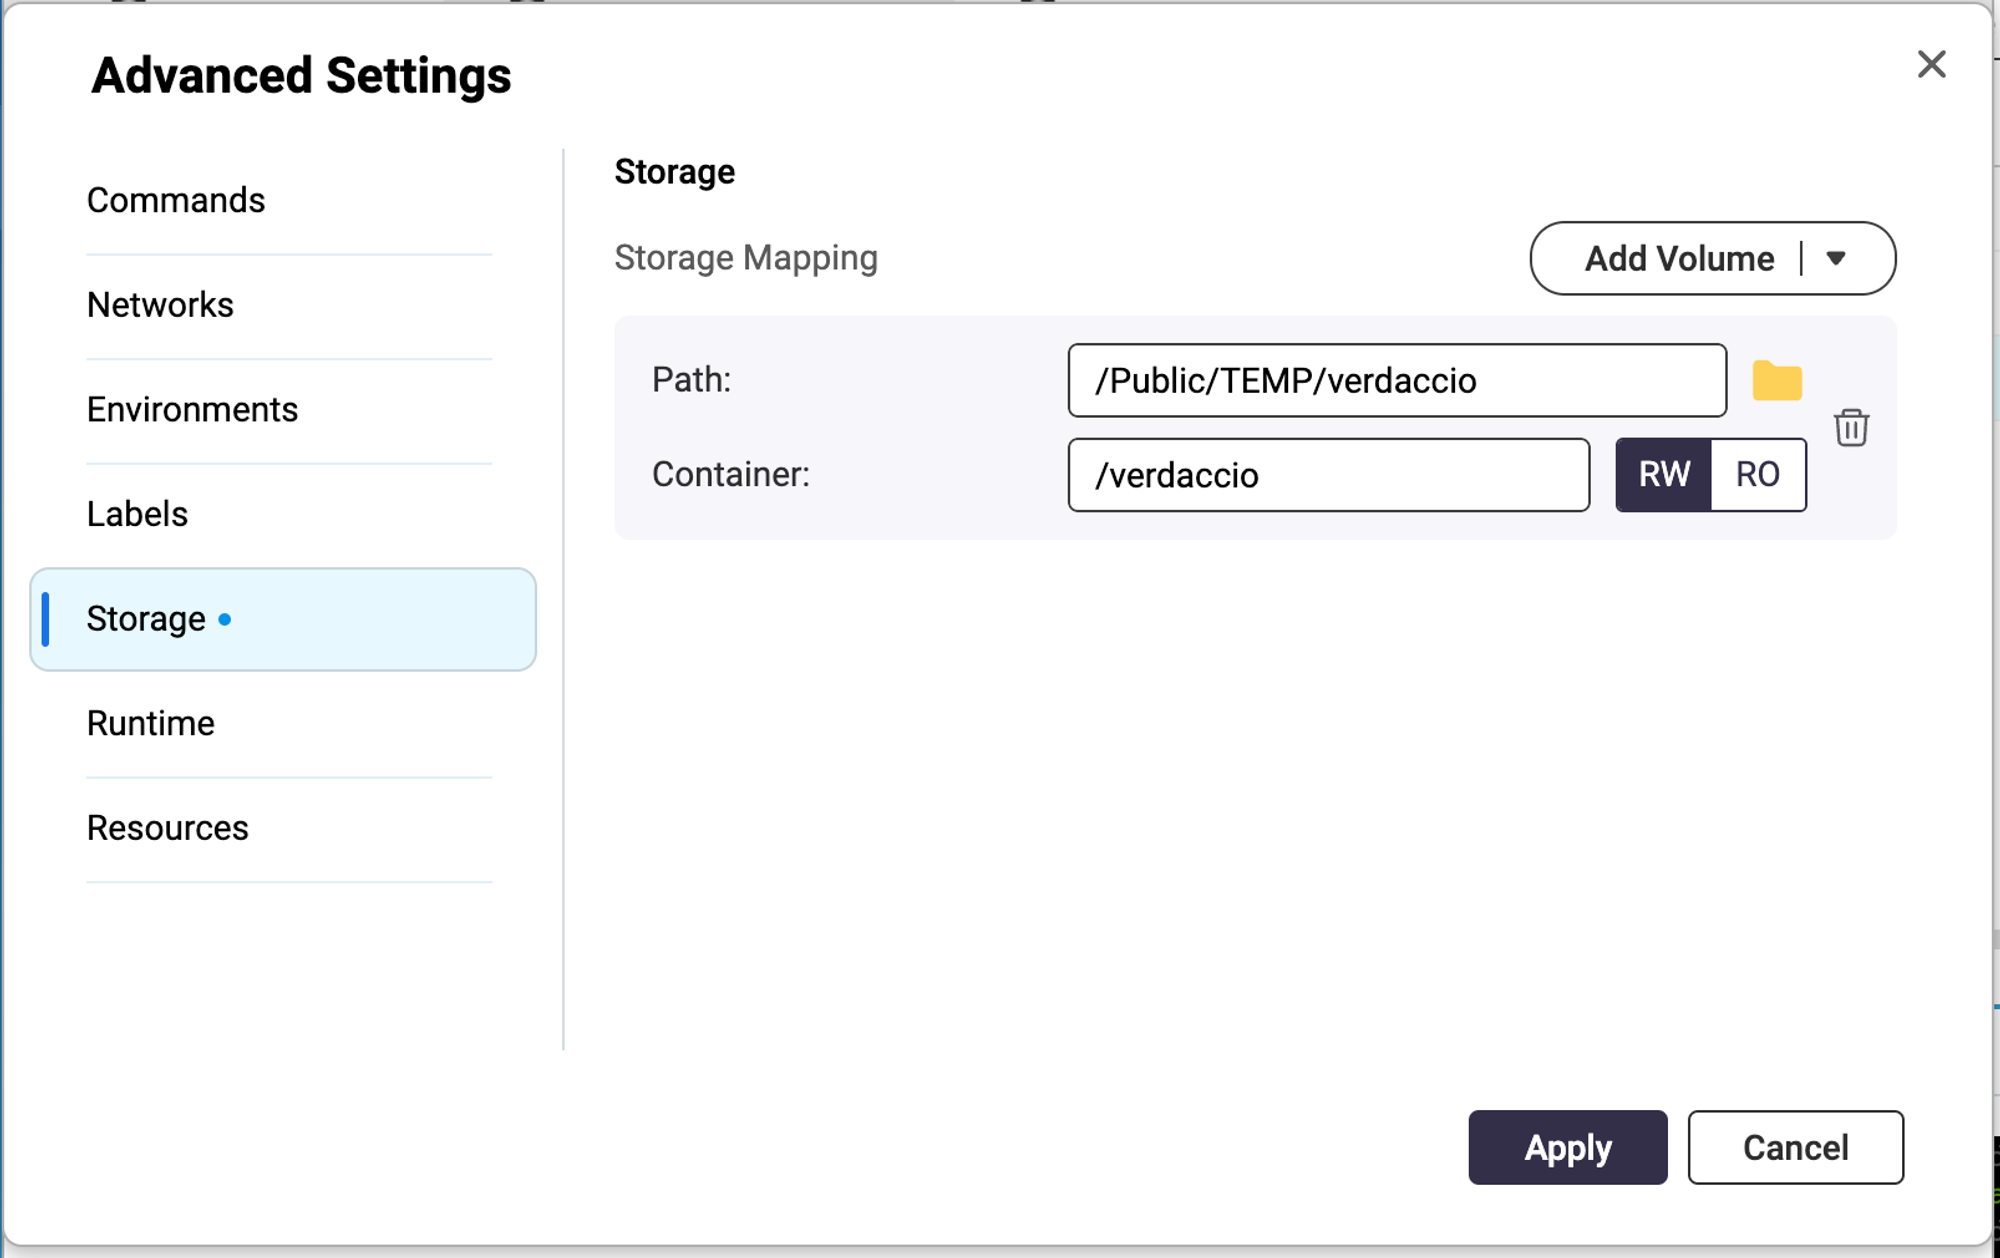
- Make sure that folder exists, make a conf folder inside of it and put the config.yaml in there
- make a storage folder inside the conf folder and put packages +
.verdaccio-db.jsonin there (if not starting empty)
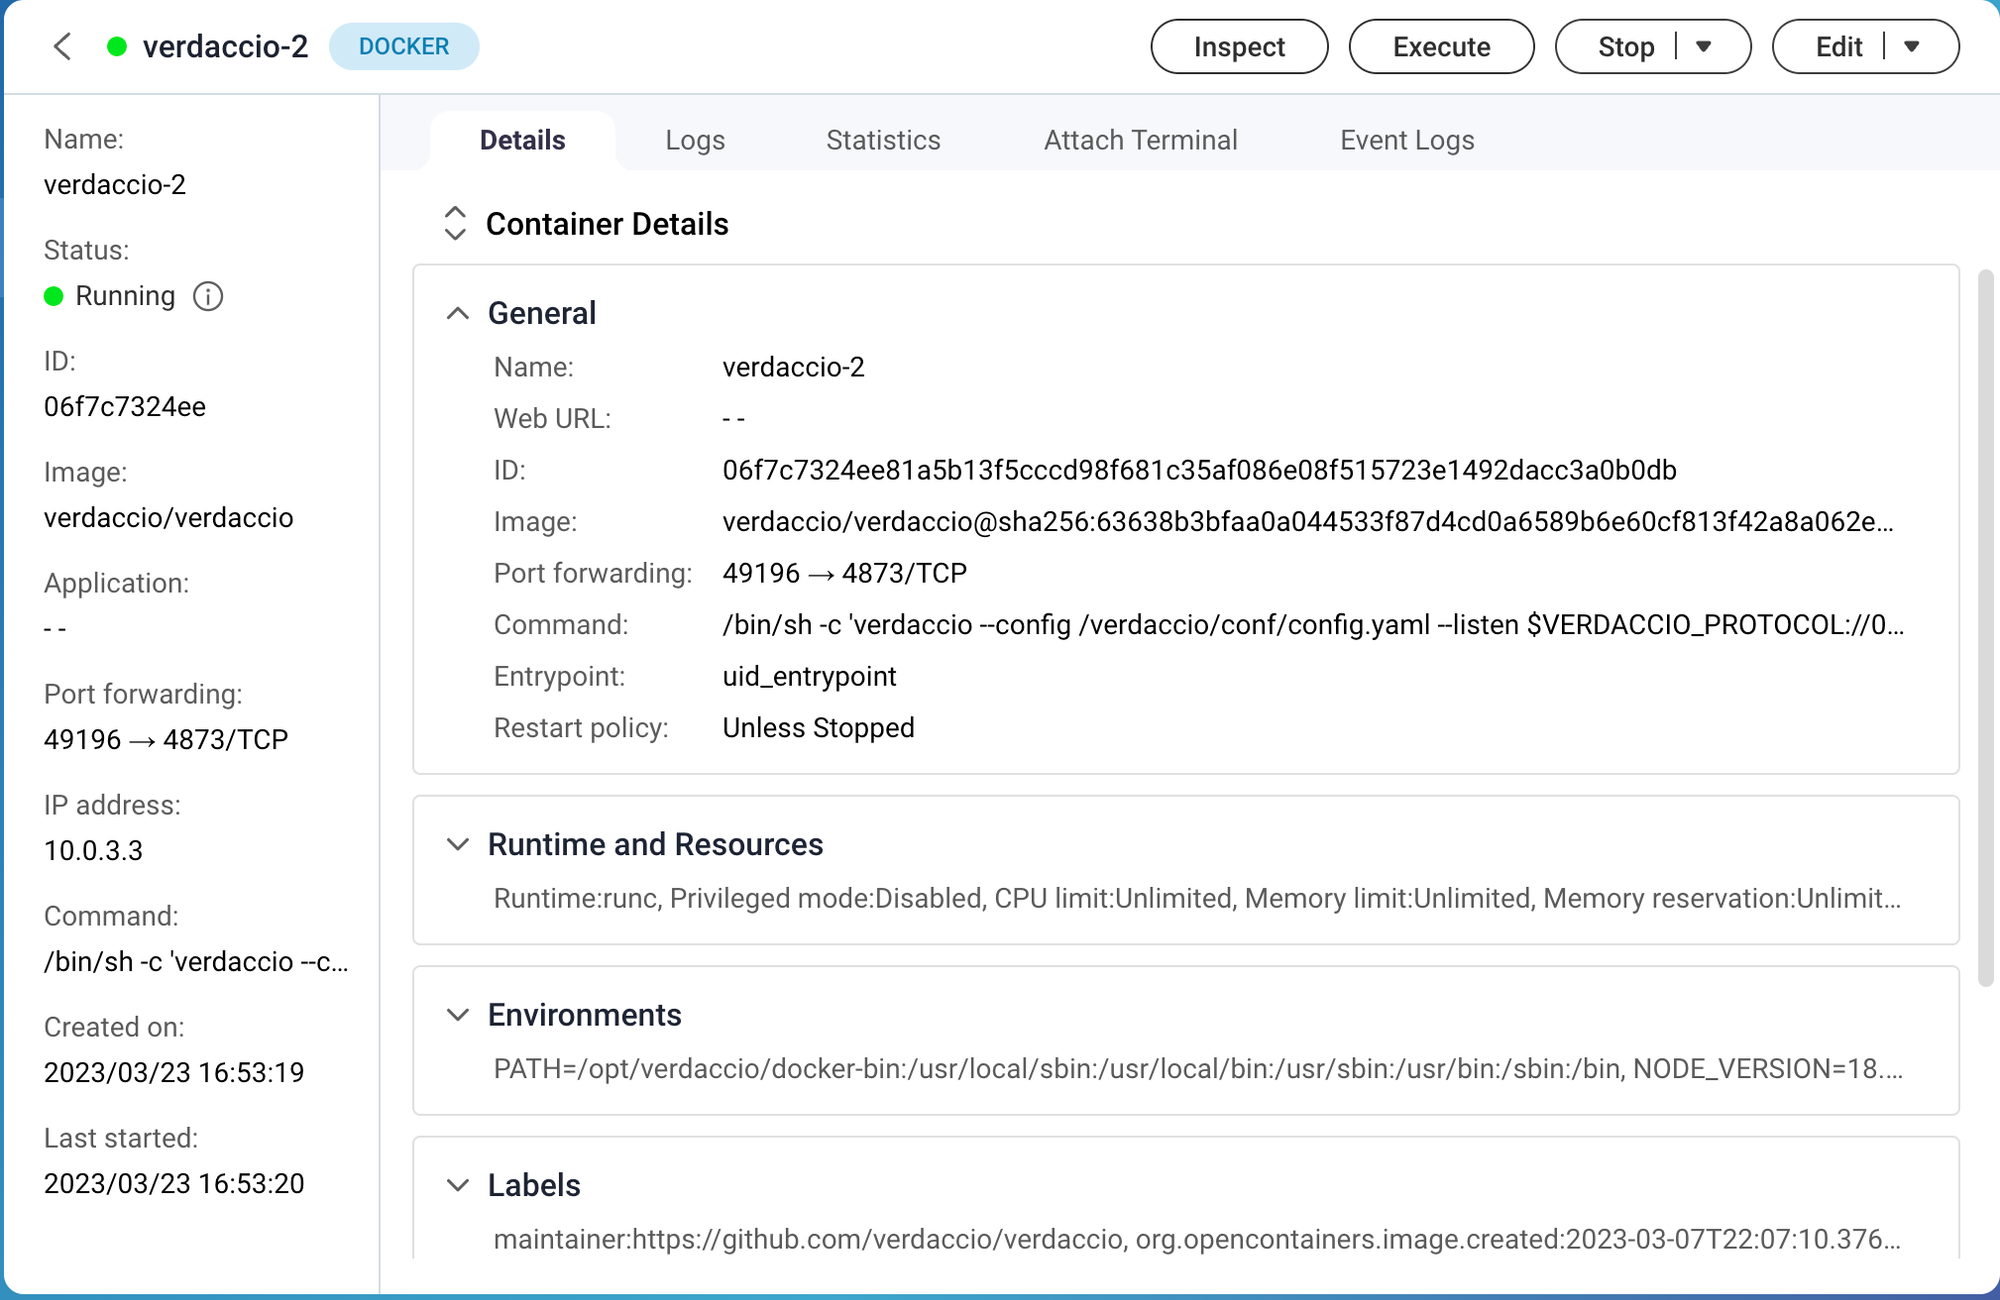
- Now Create it, watch it start, go into the detailed view - if you click on the port forwarding port it copies the URL into your clipboard

- Go to that url and it should all be there! But the IP changes at every restart. We can create a fixed IP address for it like this:
- Edit Container > Network
- Add > Network Mode: Bridge > Check
Use a static IP address, set it to something > Connect > Apply

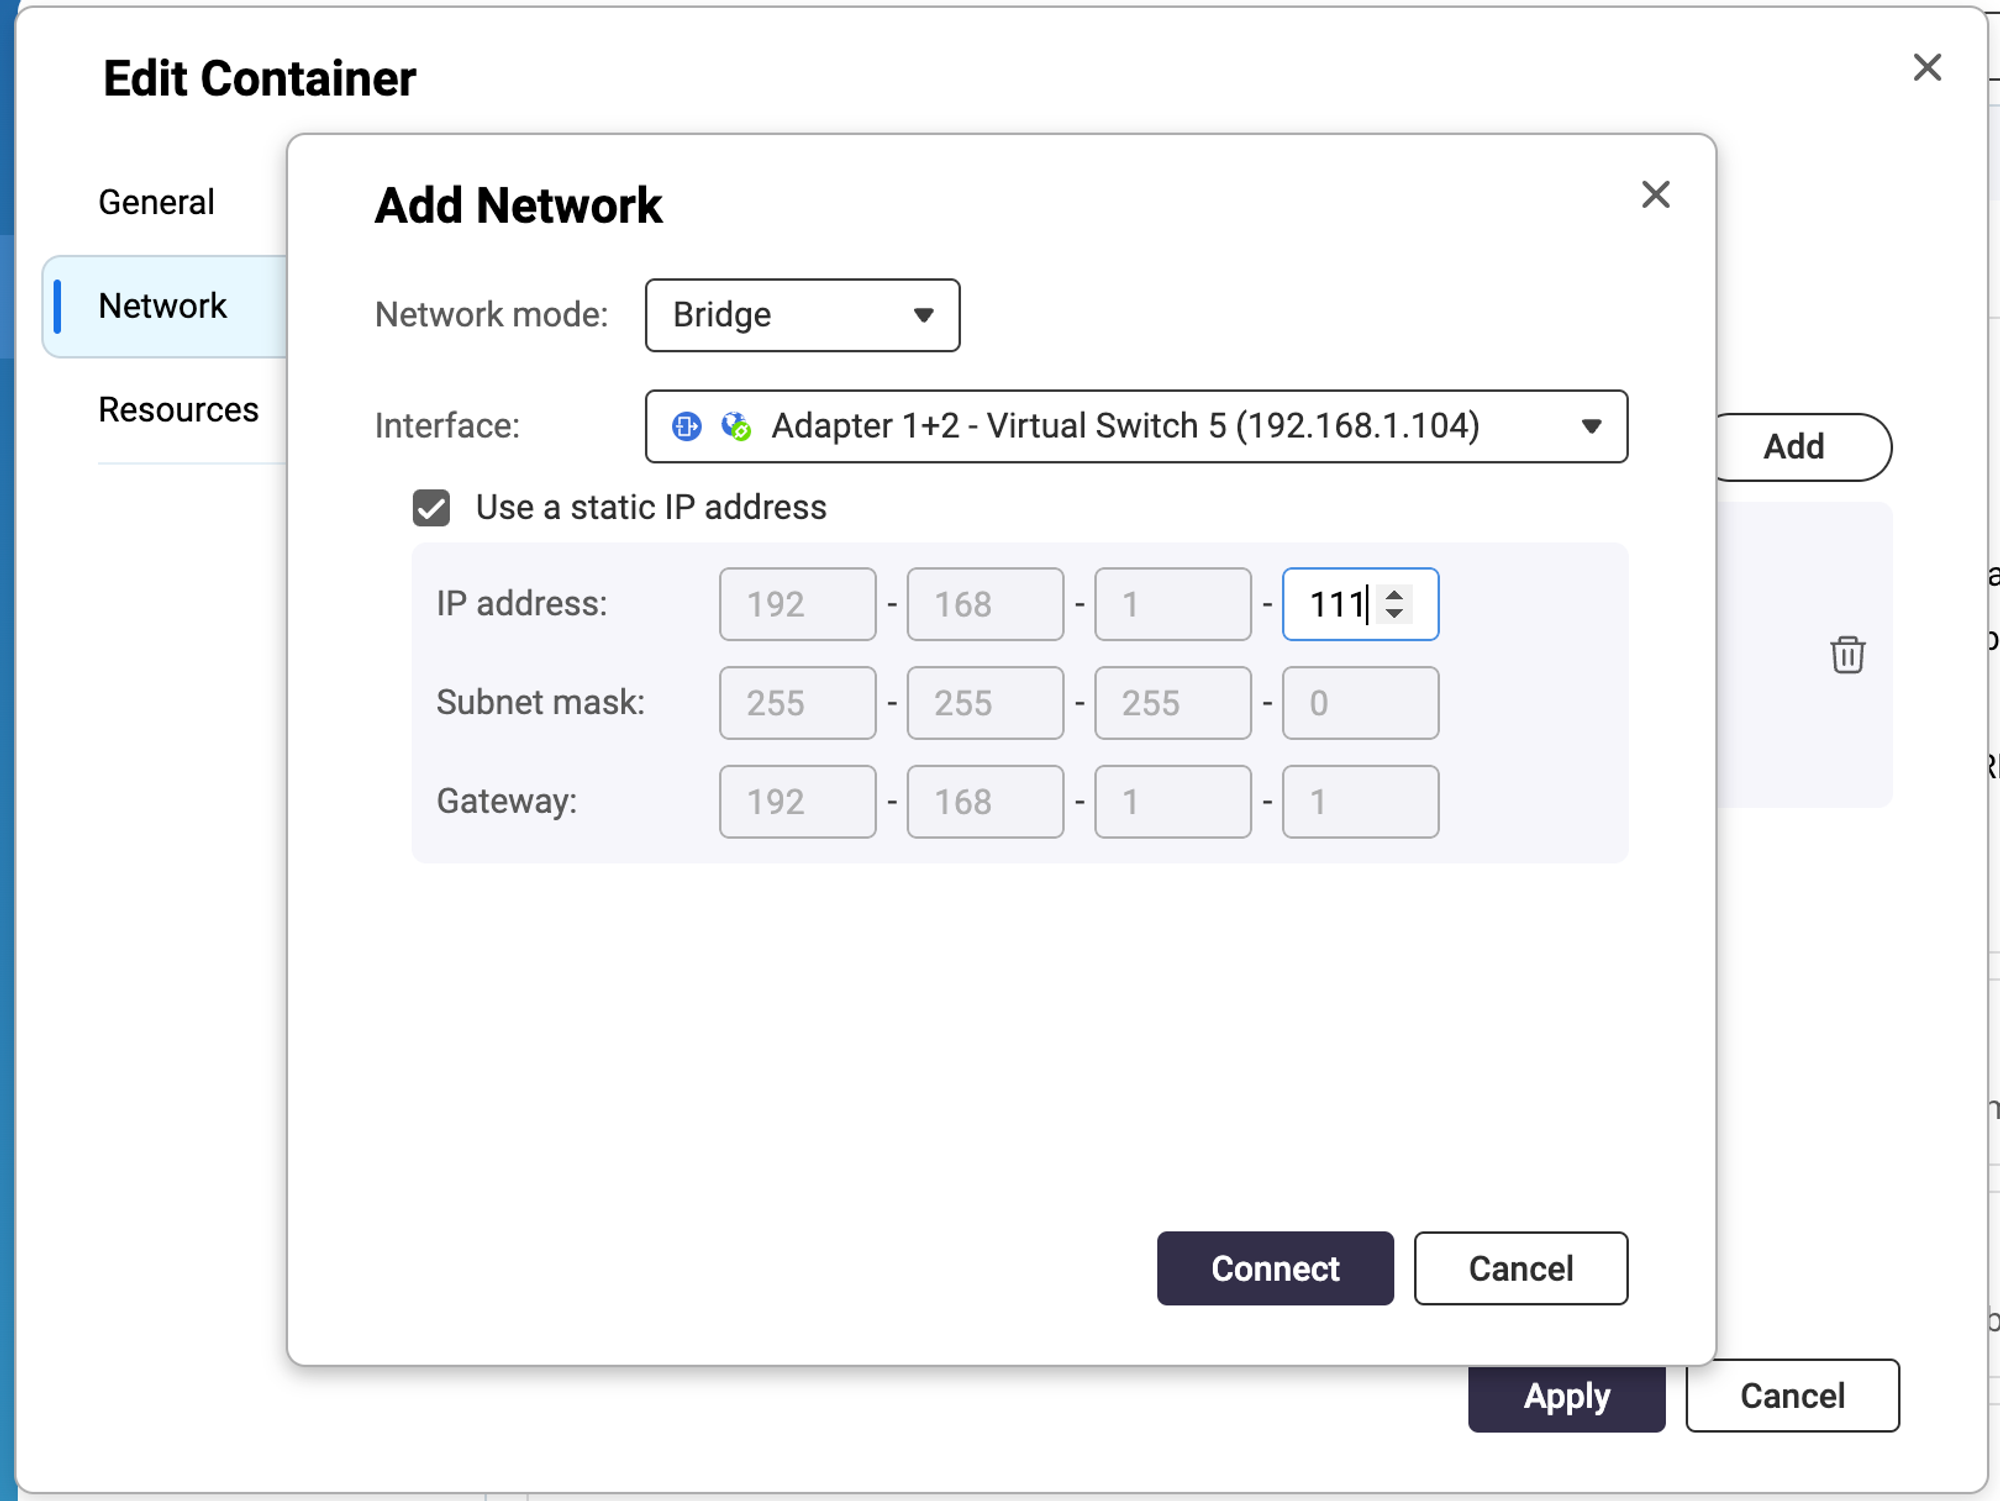
- Restart and then it should be accessible via its static IP! (You can remove the other network)
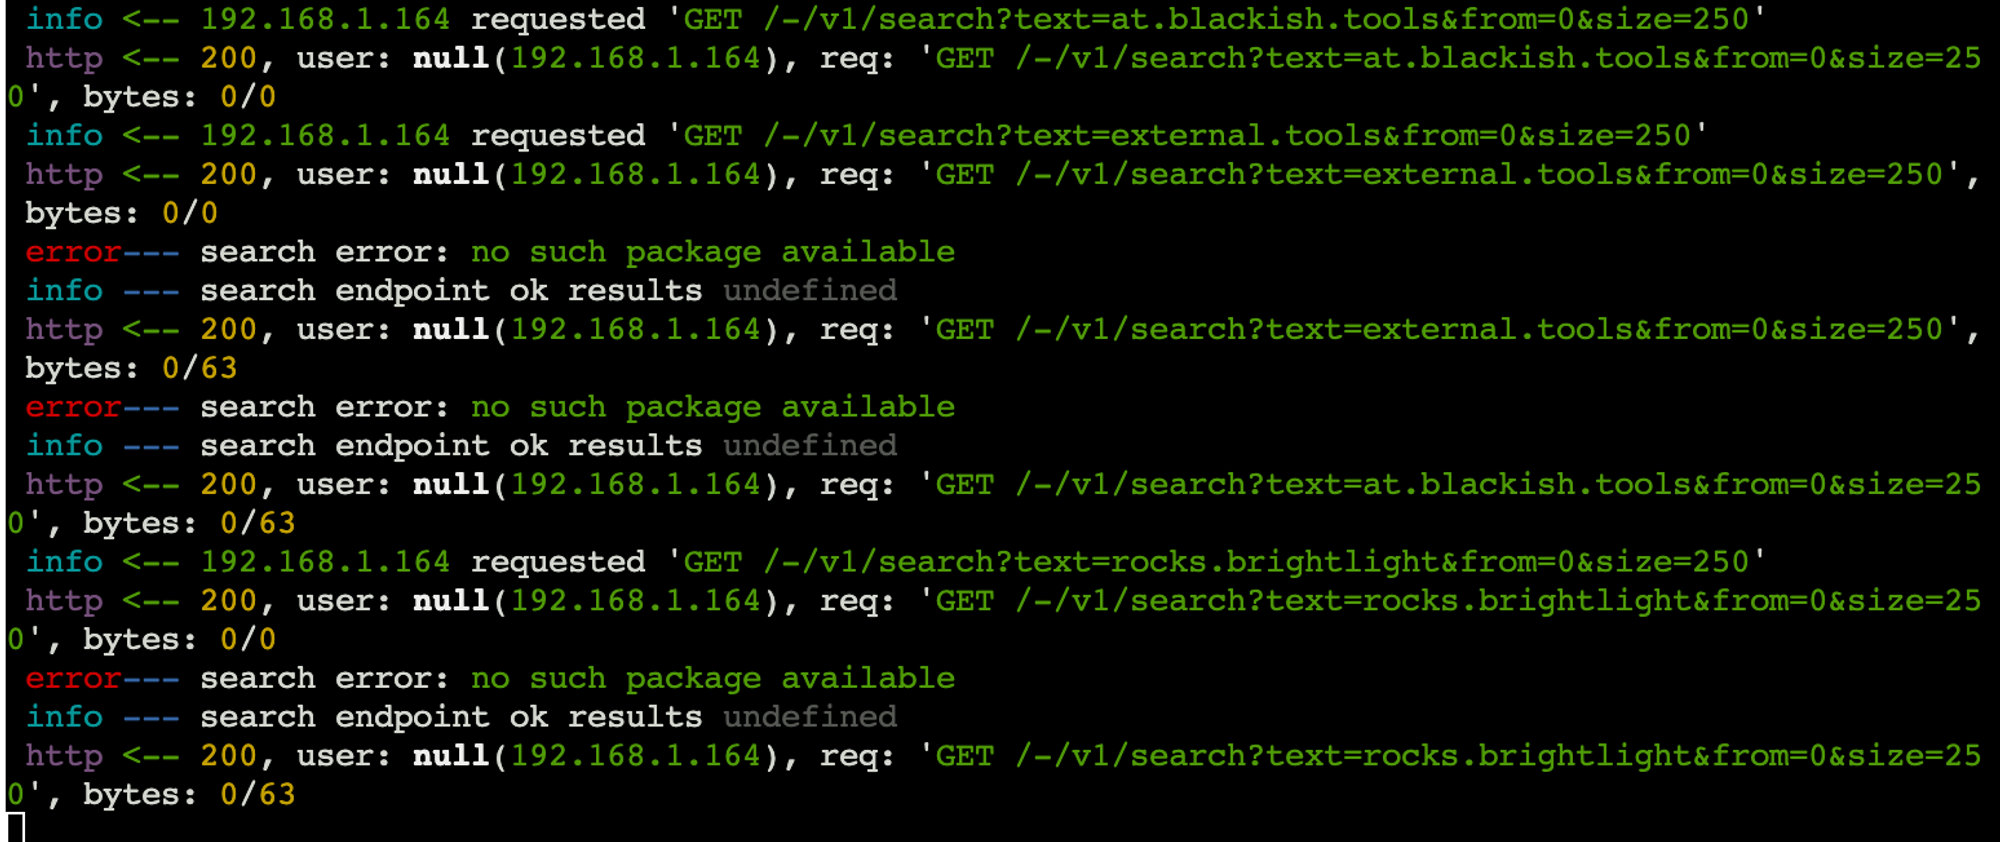
But I can’t get this one to show up under My Registries in Unity. The one running in a VM with a local DNS record works just fine… No idea why it doesn’t like this one… Might be an issue with having the storage on the NAS drive - but downloading right from the web interface works 😕
shows these errors: