Arduboy Course - Part I: Basics
Sections marked with 🎓 are advanced knowledge. You can ignore these for now and unfold them once you’re ready to dig deeper!

Arduboy Basics (PDF) ← Here’s an even simpler single page introduction for you to 🖨️ print
Arduboy Course (so far)
-
📓 Arduino C++ Basics** **
-
📘 Arduboy Part 1: Basics (this page!) ⬅️ YOU ARE HERE
Arduboy Basics

This page is a basic introduction to the Arduboy and the “Arduboy2” library we will use to make games for the Arduboy.
We’ll go through:
-
What even is an “Arduboy”?
-
How to set it all up
-
How to draw to the screen
-
How to work with button input 🎮
-
How to turn on the LED 🔆
-
How to make sound 🔉
What’s an Arduboy?
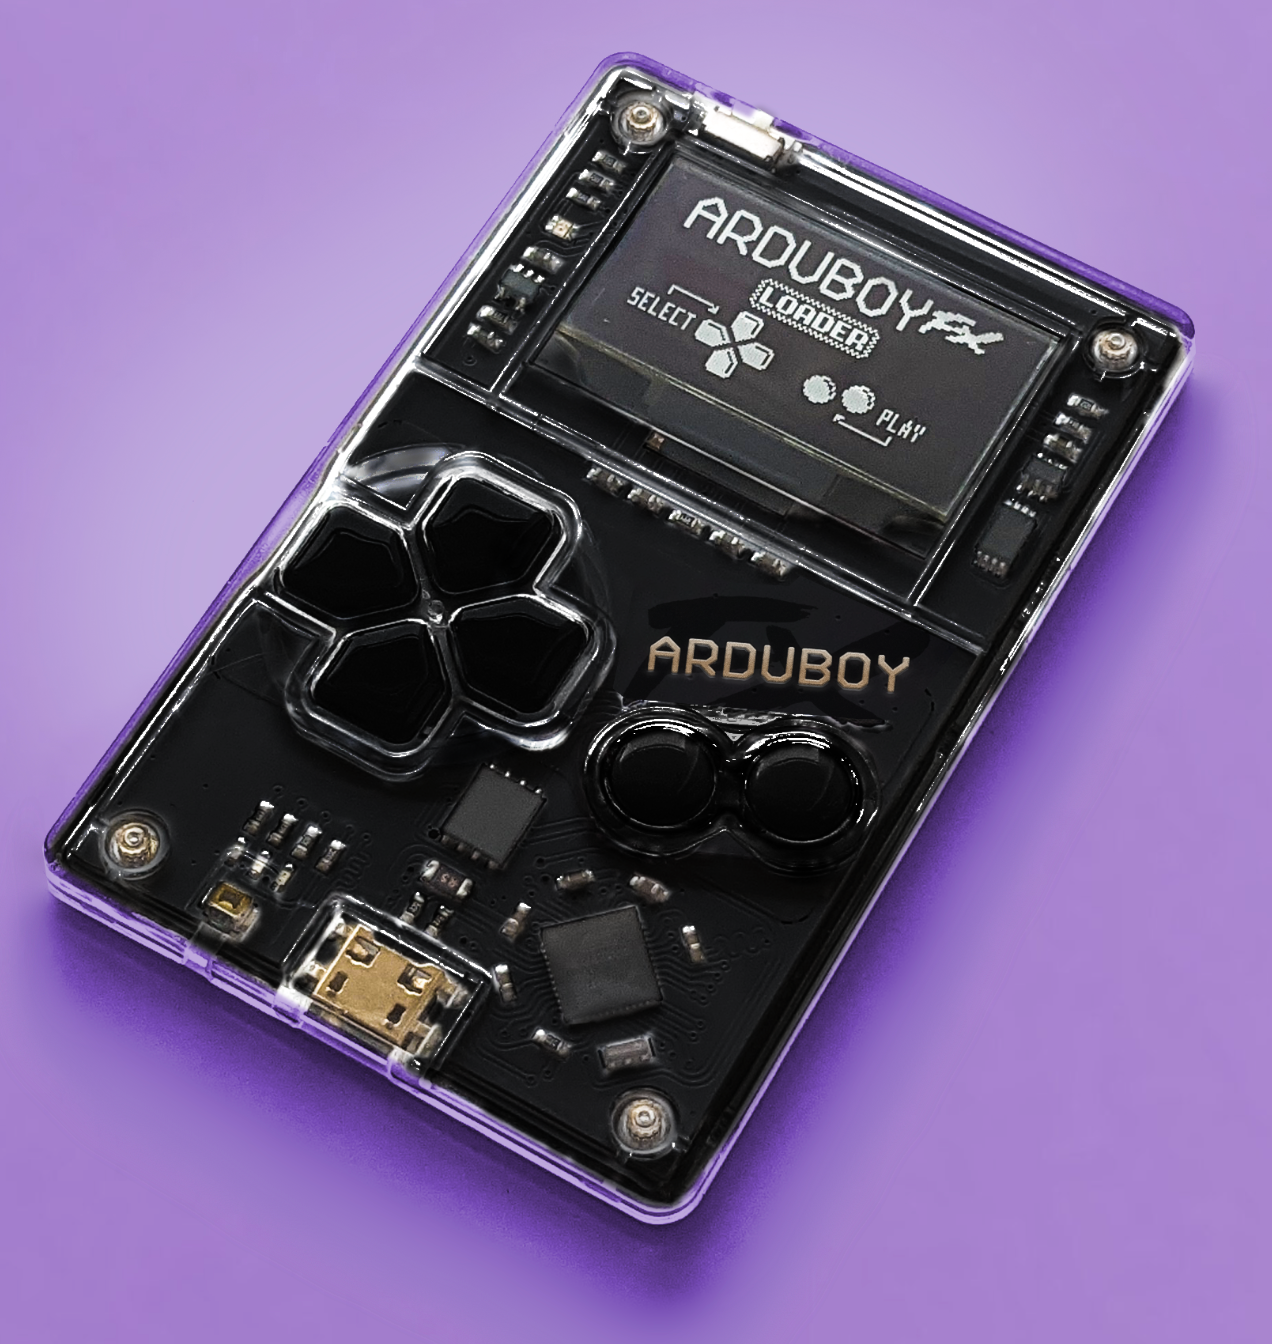
An Arduboy is a portable gaming console with a 128X64 pixel, 1-bit OLED display (black and white only), running on an ATmega32u4 chip (as you find on the Arduino Leonardo, Arduino Micro or Sparkfun Pro Micro)
It’s easy to build one yourself or you can order a credit-card-sized version on https://arduboy.com
Prerequisites ⬇️
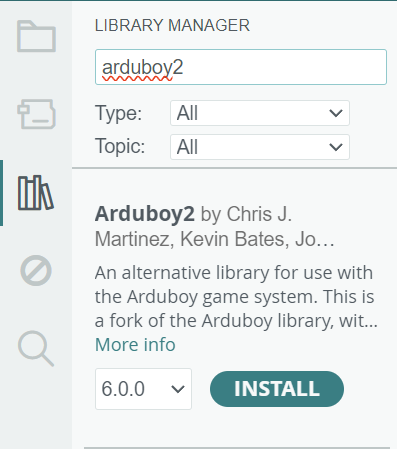
- Install the Arduboy2 library from within the Arduino IDE or PlatformIO
If you have a homemade Arduboy that uses slightly different components, you MUST NOT have this library installed (uninstall it if you have it installed). Instead use the Arduboy-homemade-package (follow the instructions on their github page - it adds compatibility for a wide range of displays and microcontrollers)
Arduboy Library basics
If you haven’t, check out the article about the basics of Arduino C++
Here’s a very simple example that tracks if the user presses the A or B button and prints “A” and/or “B” onto the screen while these buttons are held down:
#include <Arduino.h>
#include <Arduboy2.h> // 1. Include the Arduboy2 library

Arduboy2 arduboy; // 2. Create an instance of the Arduboy2 class

void setup() {
	// initiate arduboy instance
	arduboy.begin(); // 3. call the begin() method
}

void loop() {
	if (!(arduboy.nextFrame()))	return; // 4. pause render until it's time for the next frame

	// 5. Do whatever we want to do
	arduboy.clear(); // first we clear our screen to black
	arduboy.pollButtons(); // then we poll the buttons

	if(arduboy.pressed(A_BUTTON)) { // is button A pressed?
		arduboy.setCursor(96, 38); // then set the cursor to a specific position
		arduboy.print("A"); // and draw an "A" at that position (in the buffer, not on screen yet)
	}

	if(arduboy.pressed(B_BUTTON)) {
		arduboy.setCursor(106, 28);
		arduboy.print("B");
	}

	// in the end we tell the arduboy to display everything we drew into the buffer this frame
	arduboy.display(); // 6. Put it all on the screen
}

Heres’ an explanation of what it does:
-
We include the Arduboy2 library with
#include <Arduboy2.h> -
Create an instance of the Arduboy2 class. (
Arduboy2 arduboy;, wherearduboyis our variable name for the object. ← This is what we’ll be talking to.) -
We call
arduboy.begin()insetup()to get it to do whatever it needs to do internally to be ready. (Initialize the hardware, show the Arduboy boot logo, etc.) -
At the top of loop we do
if(!(arduboy.nextFrame())) return;to make it wait until it’s time to render the next frame (per default the framerate is limited to 60fps). This line essentially means:ifwe’re not (!) ready for the next frame (arduboy.nextFrame()), thenreturn(exit theloop()function before anything below this line can be executed) - so the program will only run this first line again and again and again until the time is ready to render a new frame! -
Then we do whatever we want to do - in this case we’re clearing the screen, then polling the buttons, then checking for button presses and printing stuff onto the screen (actually goes into the screen buffer at this point)
-
Finally, we tell it to render everything from the screen buffer onto the actual screen so our users can see it!
🎓 Extended example
Drawing to the screen 🖥️
Every frame we want to do the following:
-
Clear the screen:
arduboy.clear() -
Draw to the framebuffer with all the Text, Shapes and Sprite functions explained below
-
Plot the contents of the framebuffer onto the actual screen:
arduboy.display()
🎓 Framebuffer Explanation
Text 🔤
Define a color, set the cursor to where you want to put your text, then print it!
arduboy.setTextColor(WHITE); // Set the color of the text you want to print (your choices on a 1-bit display are BLACK and WHITE)
arduboy.setCursor(42, 18); // Set the pixel position of where you want to print text (you set the top left position)
arduboy.println("Hello World"); // Prints "Hello World" at the defined cursor position and sets the cursor to the next line.
arduboy.print("Yeah!"); // Prints "Yeah!" and does not change the cursor position.
Shapes 🟣
This is how we can draw pixels, lines, circles, rectangles, and triangles:
arduboy.drawPixel(64, 32, WHITE); // Draws a pixel at position x:64/y:32
arduboy.drawLine(2, 2, 100, 2, WHITE); // Draws a line from x:2/y:2 to x:100/y:2
arduboy.drawCircle(20, 32, 10, WHITE); // Draws the outline of a white circle at position x:20/y:32, with a radius of 10px
arduboy.drawRect(10, 5, 20, 7, WHITE); // Draws a rectangle at position x:10/y:5 with a width of 20px and a height of 7px
arduboy.drawRoundRect(60, 5, 20, 7, 4, WHITE); // Same as above, except with rounded corners (corner radius 4px)
arduboy.drawTriangle(10, 10, 20, 10, 10, 20, WHITE); // Draw a triangle. Point 1 at 10/10, point 2 at 20/10, point 3 at 10/20.
Pretty much the same functions also exist in versions for filled shapes:
arduboy.fillCircle(20, 32, 10, WHITE); // Draws a filled white circle at position x:20/y:32, with a radius of 10px
arduboy.fillRect(10, 5, 20, 7, WHITE); // Draws a filled Rect at position x:10/y:5 with a width of 20px and a height of 7px
arduboy.fillRoundRect(60, 5, 20, 7, 4, WHITE); // Same as above, except with rounded corners (corner radius 4px)
arduboy.fillScreen(BLACK); // Fill the entire screen with a color
arduboy.fillTriangle(10, 10, 20, 10, 10, 20, WHITE); // Draw a filled triangle. Point 1 at 10/10, point 2 at 20/10, point 3 at 10/20.
For most of these functions the color attribute is actually optional and will default to WHITE if omitted.
Sprites 🖼️
We can draw images to the screen as well! But we don’t store our images as files, instead we include them in the source code.
-
Make an image (Aseprite is my favourite sprite editor, but you could just as well use a free web-tool like Piskel!)
-
You can include multiple sprites/frames in a single image, but be sure to stack them vertically!
-
Send your image through this web-tool: https://www.bloggingadeadhorse.com/TeamARGImgConverter/ to translate it into an array of bytes that we can then paste into the source code.
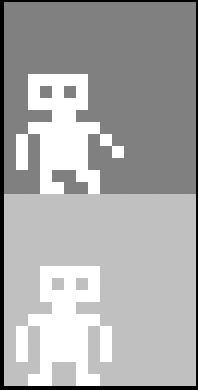
The result will look like this:
// Result of a 16x32 image with 2 sprites of a little guy
const uint8_t PROGMEM guy[] = {
16, 16, // size of one frame - must be multiples of 8!
0x00, 0x00, 0xc0, 0x40, 0xc0, 0x40, 0xc0, 0x00, 0x00, 0x00, 0x00, 0x00, 0x00, 0x00, 0x00, 0x00,
0x00, 0x38, 0x05, 0xfd, 0xbf, 0x3f, 0x7d, 0xc4, 0x08, 0x10, 0x00, 0x00, 0x00, 0x00, 0x00, 0x00,
0x00, 0x00, 0x00, 0xc0, 0x40, 0xc0, 0x40, 0xc0, 0x00, 0x00, 0x00, 0x00, 0x00, 0x00, 0x00, 0x00,
0x00, 0x38, 0x84, 0xfd, 0x3f, 0x3f, 0xfd, 0x85, 0x38, 0x00, 0x00, 0x00, 0x00, 0x00, 0x00, 0x00,
};
The width can be any value. The height must be a multiple of 8 pixels. It makes sense to create a sprite sheet and include multiple frames in the same image.
PROGMEM is a special keyword used to store data in the microcontroller’s program memory (flash memory) instead of RAM. We don’t want to change our Sprites on the fly, so why waste RAM?
Then we can draw an image onto the screen like this:
Sprites::drawOverwrite(11, 22, guy, 0); // draws the first frame (index 0) from our guy data at position x:11/y:22
wtf does :: do? TL;DR: Just accept that that’s what you have to do in this case 😉
But if you want to know more: :: is the Scope Resolution Operator and is used to access static members of a class, meaning we use it to access a method of a class that can be accessed without having an instance object of that class. More info in the Arduino C++ section under Classes!
There’s more ways to draw sprites!
Sprites::drawSelfMasked(11, 22, guy, 0); // draws only the white pixels and ignores the black pixels
Sprites::drawErase(11, 22, guy, 0); // erases the image from the background, so all white pixels in the image will be set to Black, Black pixels are ignored.

Part III will be all about making and displaying Sprites!
There’s more in the 📘 official documentation here: https://mlxxxp.github.io/documents/Arduino/libraries/Arduboy2/Doxygen/html/annotated.html
Input 🕹️
First we need to call pollButtons - this is needed to track the state of buttons over time.
arduboy.pollButtons();
Then we can check if buttons are pressed or not pressed, etc.
if(arduboy.pressed(A_BUTTON)) {} // do something if the A button is pressed
if(arduboy.justPressed(B_BUTTON)) {} // do something if the B button was just pressed this frame (but not afterwards, if the user keeps holding it down)
if(arduboy.justReleased(B_BUTTON)) {} // do something if the B button was just released this frame
if(arduboy.notPressed(UP_BUTTON)) {} // do something if the up button is NOT pressed
if(arduboy.anyPressed(LEFT_BUTTON | RIGHT_BUTTON)) {} // do something if either the left or right buttons are pressed
LED 🔆
Use the setRGBled method to change the color of the LED. The 3 arguments take values for Red, Green and Blue from 0 to 255.
arduboy.setRGBled(127, 0, 0); // Set the RGB LED to half brightness RED
arduboy.setRGBled(0, 0, 255); // Set the RGB LED to full brightness BLUE
arduboy.setRGBled(0, 0, 0); // Set the RGB LED to off (Black)
Sound 🔊
The BeepPin1 class allows you to play back tones via the Buzzer of the Arduboy.
For this to function properly you need to:
-
Call begin() on the beep instance
-
Call timer() on the beep instance (without this beeps won’t stop automatically!)
-
Call tone(timer count, duration in frames) to make it beep
#include <Arduino.h>
#include <Arduboy2.h>

Arduboy2 arduboy;
BeepPin1 beep; // class instance for speaker pin 1

void setup() {
	arduboy.begin();
	beep.begin(); // set up the hardware for playing tones
}

void loop() {
	if (!(arduboy.nextFrame()))	return;
	arduboy.pollButtons();
	beep.timer(); // handle tone duration - without this it will keep beeping forever
	if(arduboy.justPressed(A_BUTTON)) {
		beep.tone(beep.freq(440), 5); // beep at 440Hz for 5 frames
	}
}
🎓 Beep 2 tones at the same time
🎓 Play Melodies
Building a .hex file

Arduino games are often shared as binary .hex files. This is how you create one!
Arduino IDE:
-
Sketch>Export Compiled Binary -
Go to the
buildfolder that was created in your project folder -
Find the
.hexfile in there
VSCode + PlatformIO:
-
Add this line to
platformio.ini:build_type = release -
Make a build
✔️ -
Go to the
.pio/build/folder that was created inside your project folder -
Find the
.hexfile in there
👍 Now you can try it in the Ardens Microboy Simulator or share it online!
➡️ Continue in Part II
Other Resources
-
🌐 Huge list of games - find one you like and learn from the source code!
-
🌐 Mr. Incorvia’s Handheld Arduino course (lots of examples!)
Leave a comment